| Keith-Black Silvolite (UEM) forged stroker
IC944 Pistons, 21cc dish volume (30 over) |
K&N Pro Series Oil Filters
Part No. PS-2004 |
| COMP Cams SK68-232-4 - Xtreme
4x4 Cam and Lifter Kit |
COMP Cams 104 - COMP Cams
Engine Assembly Lube |
| COMP Cams 159 - COMP Cams
Engine Break-In Oil Additive |
E3 Spark Plugs E3-58 - E3
Spark Plugs |
| Standard Motor Idle Air
Control (IAC) Valve |
Harmonic Balancer RNB-594-018 |
| Holley Fuel Injector
Retaining Clips Part No. 534-103 |
VENOM High Performance Fuel
Injectors Part No. HP-624-8 |
|
↓ Click the Image to
Enlarge ↓ |
|
|


 |
|
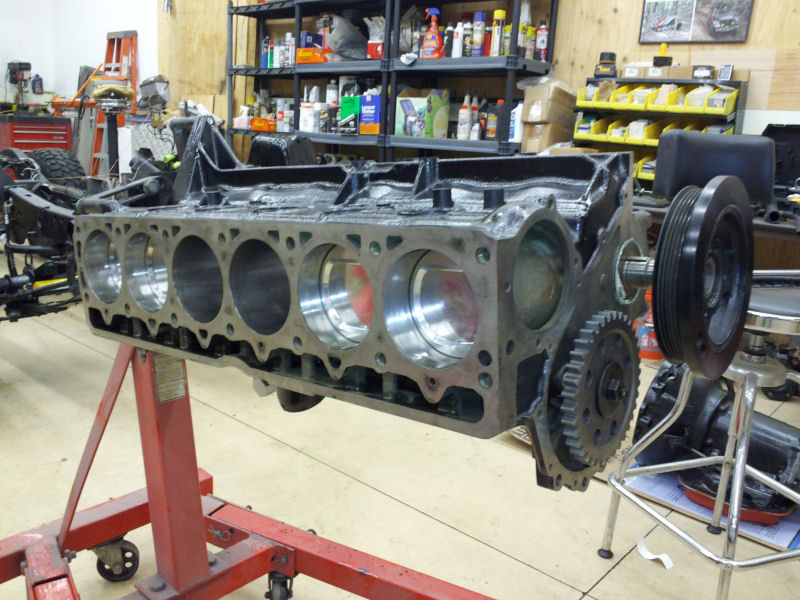
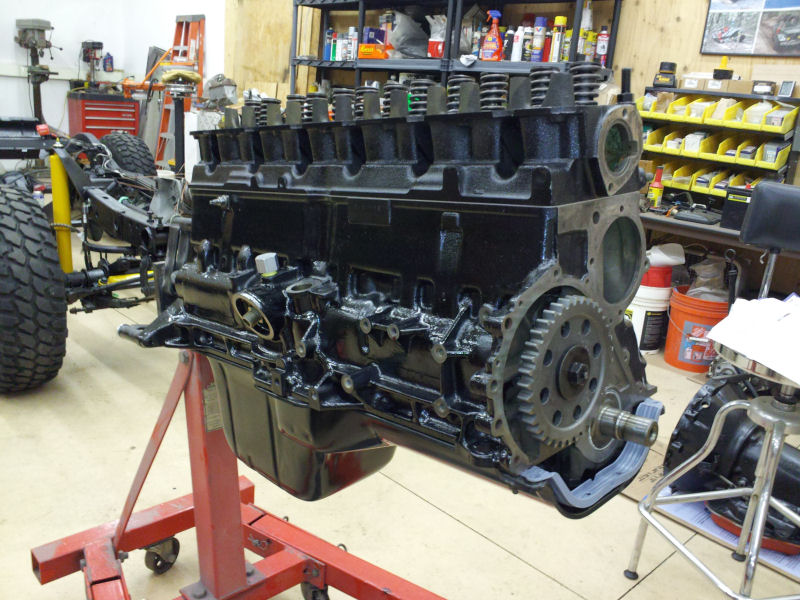
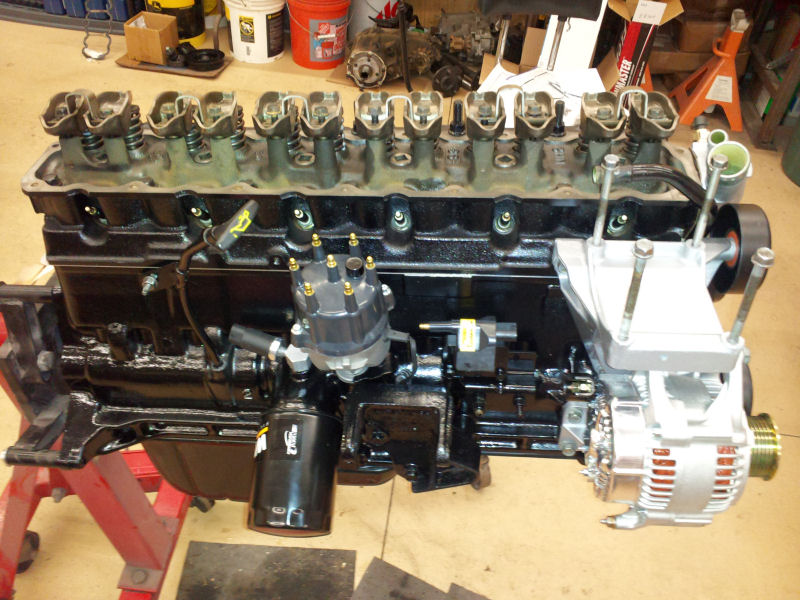
Well, after confirming the clearances for the Pistons I proceeded this
afternoon to start the engine assembly. I checked the ring gap, and
have .016 on the top and .018 on the second rings. Both above the
calculated .0156 per ICON's minimum clearance. With the correct crank
bearings also now in hand, the first item to install was the crank. I
used the Comp Cams Assembly lube during the installation. Next I
installed the oil pump, the Melling High Volume unit I had installed last
year when I got the Jeep. Next came the pistons. Even with the
correct tools, the piston aren't the easiest to install, the ring compressor
had to be just right to allow the piston to be tapped into the cylinder.
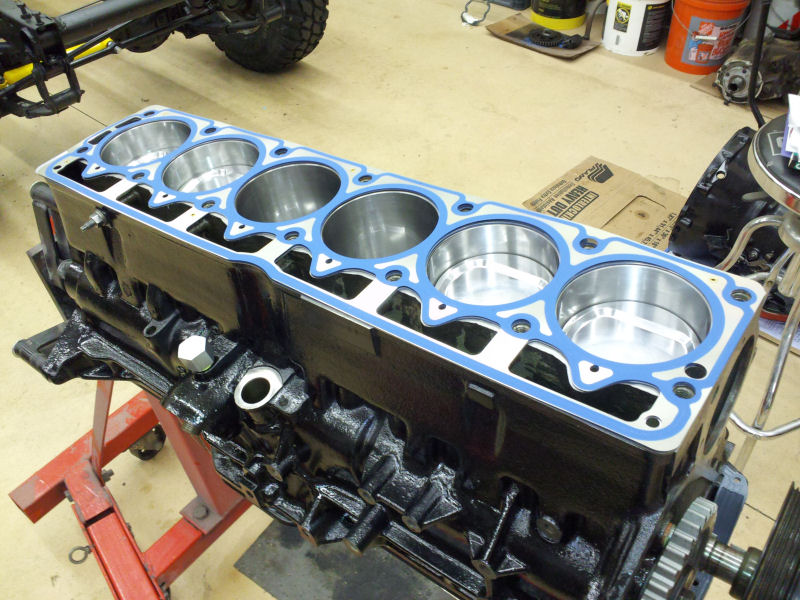
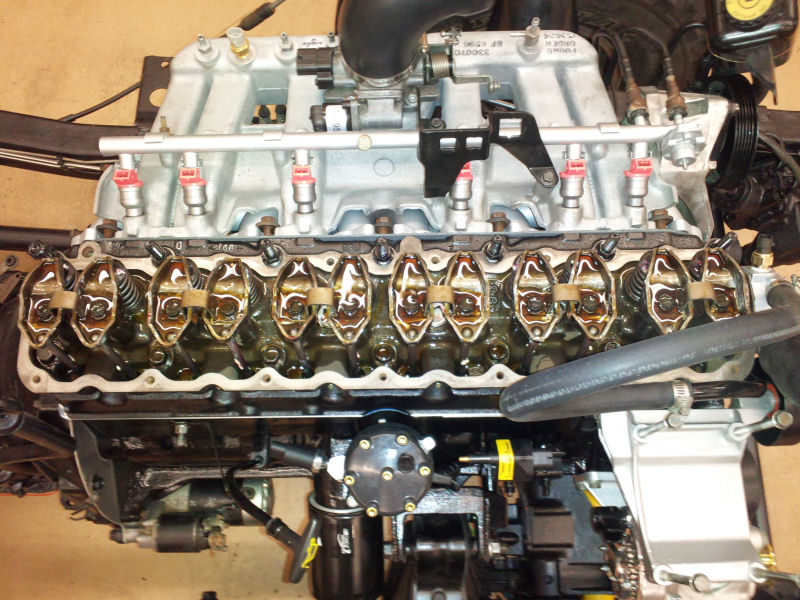
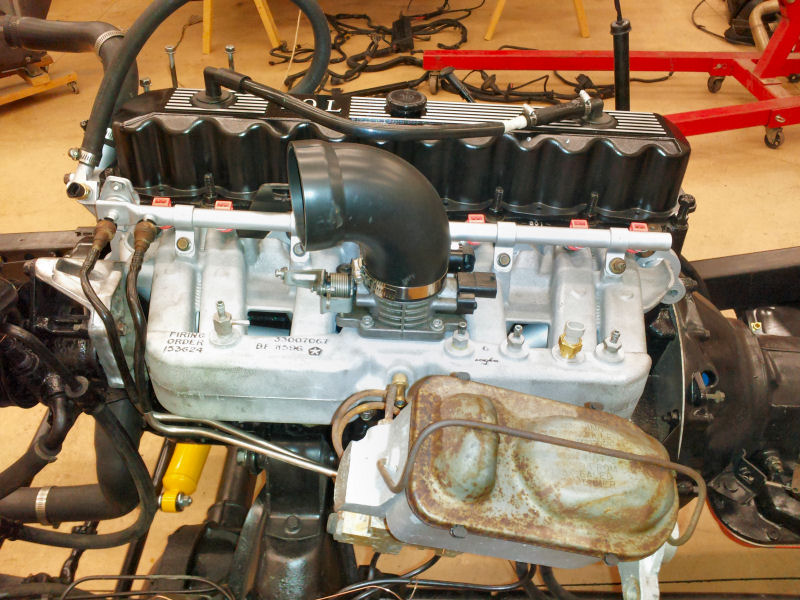
Next was the new Comp Camp. Then came the oil pan. Next was the
lifters and placement of the head gasket. Finally I installed the new
timing chain and gears. 2012-10-16 |


 |
|
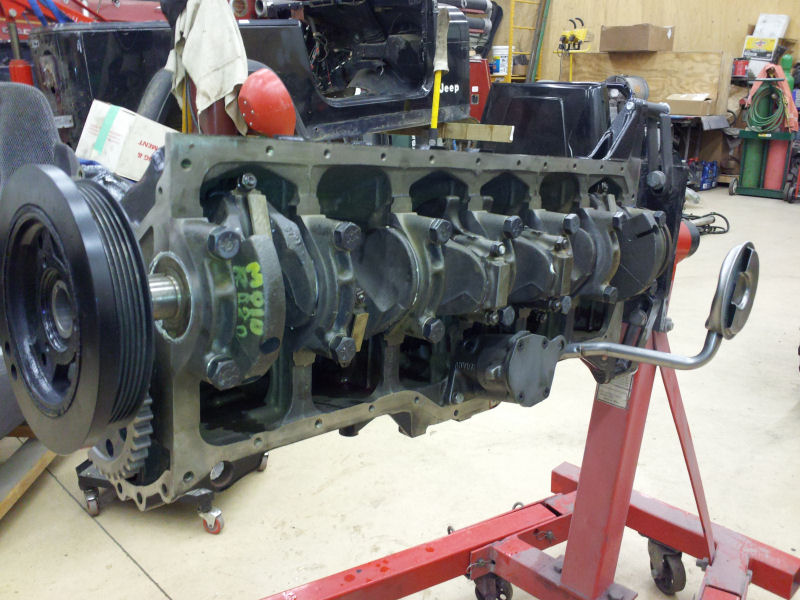
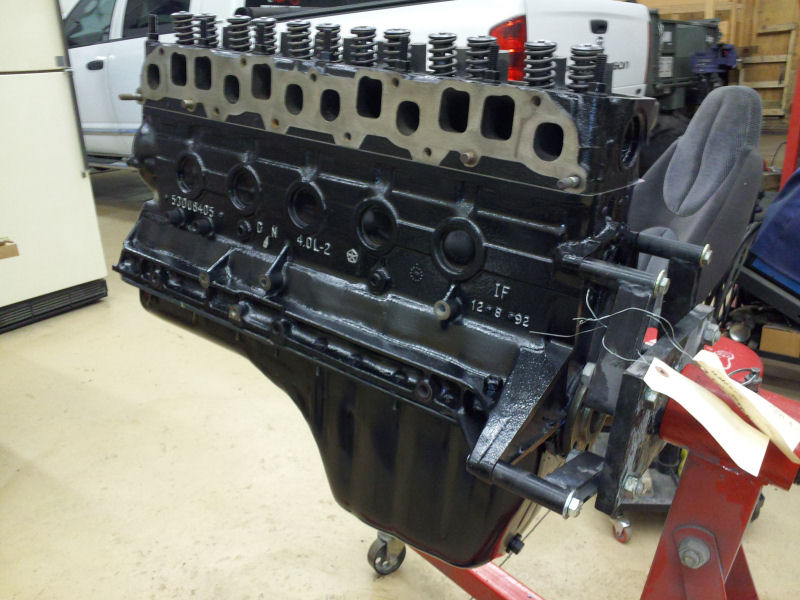
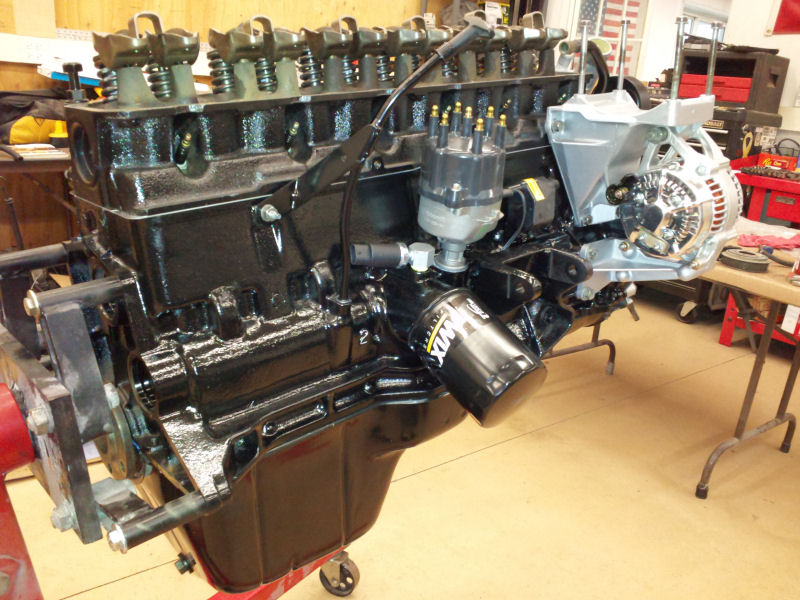
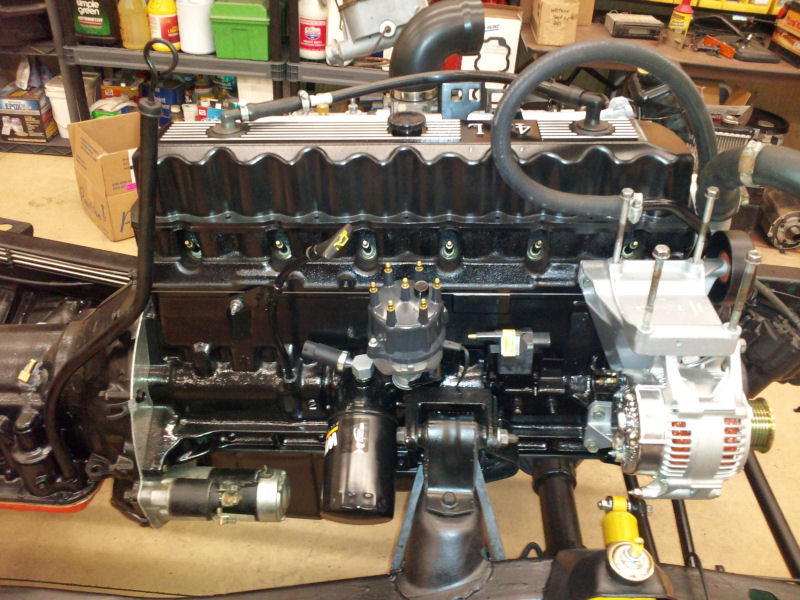
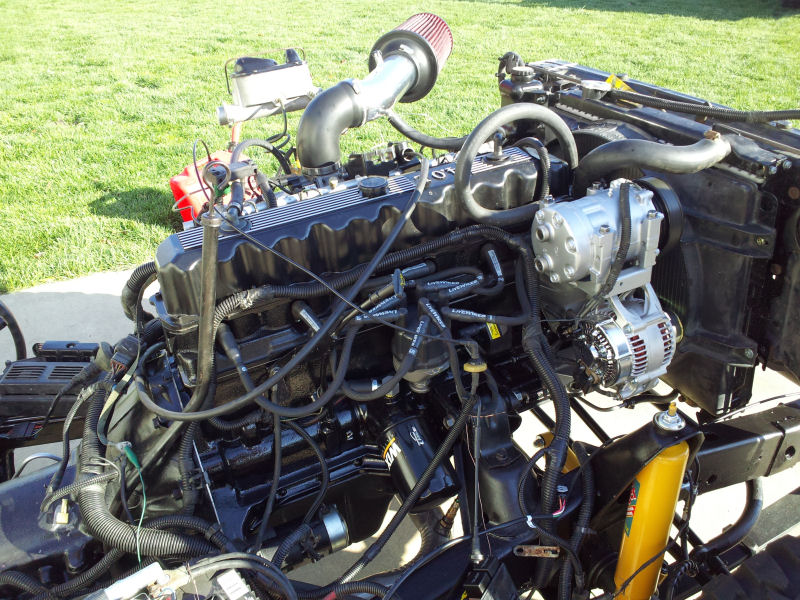
Today started out good, Assembling the Timing Cover, Water Pump,
Harmonic Balancer, Coil, Distributor, Oil Pressure Sender, Dip Stick, Oil
Filter,, Engine Brackets and Alternator. However when it
came time to install the thermostat and housing, well I was on a parts
search. Don't know why, but for some reason I put it with the body
parts, not the drive train parts, and it took a while searching and
re-searching everywhere before I found it. then I couldn't find the
bolts for it. Not sure why it was being so difficult, but bolts found,
and it's now installed. Next I started the process of using the
special measuring push rod to determine what push rods I need to order.
Will take it and one of my old rods to the Machine Shop and get a proper
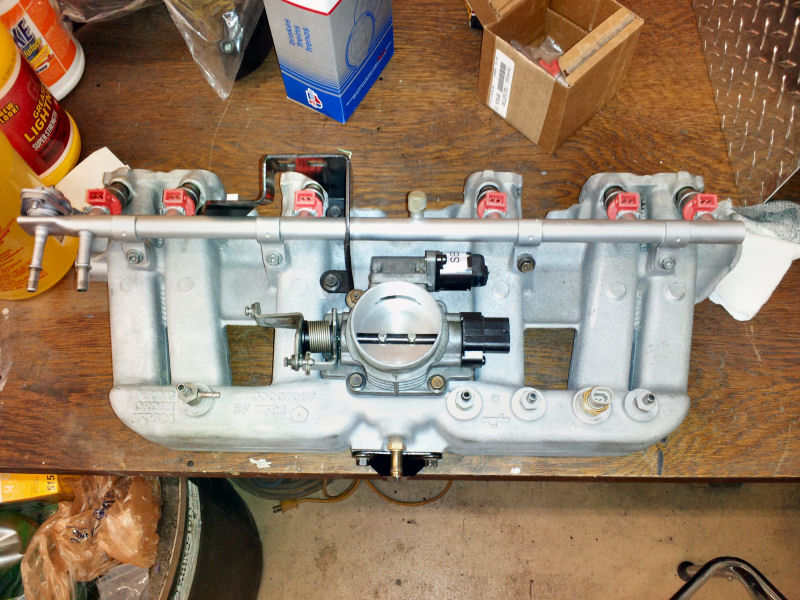
measurement and get a set ordered. Next I started the assembly of the
Intake. Not too difficult, but I used the wrong bolts for the injector rail
and snapped one off while torquing it down. So off to the parts store
to get a new set of bolts for the throttle Body. I finished the day's
work off by cleaning the A/C-Air Compressor housing for its build.
2012-10-17 |


 |
|
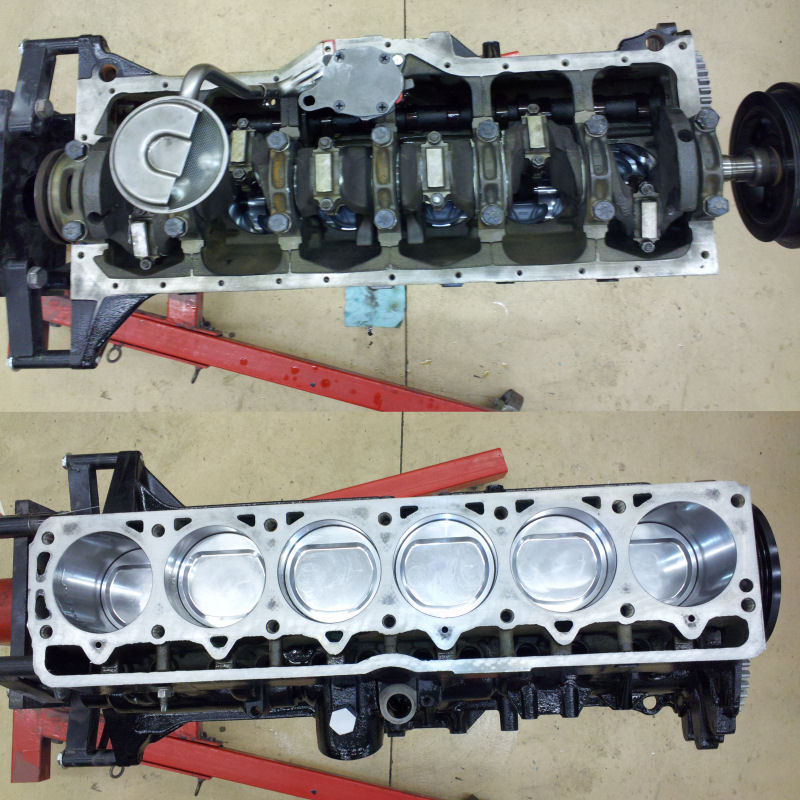
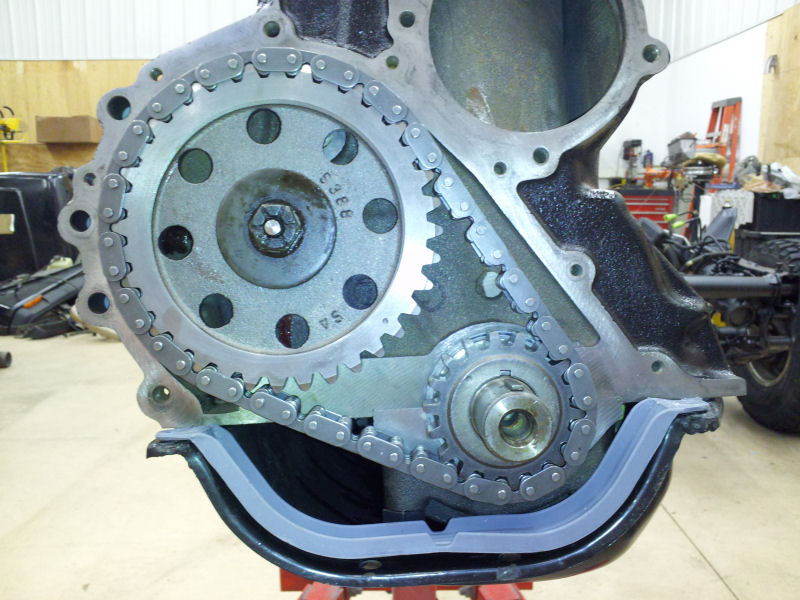
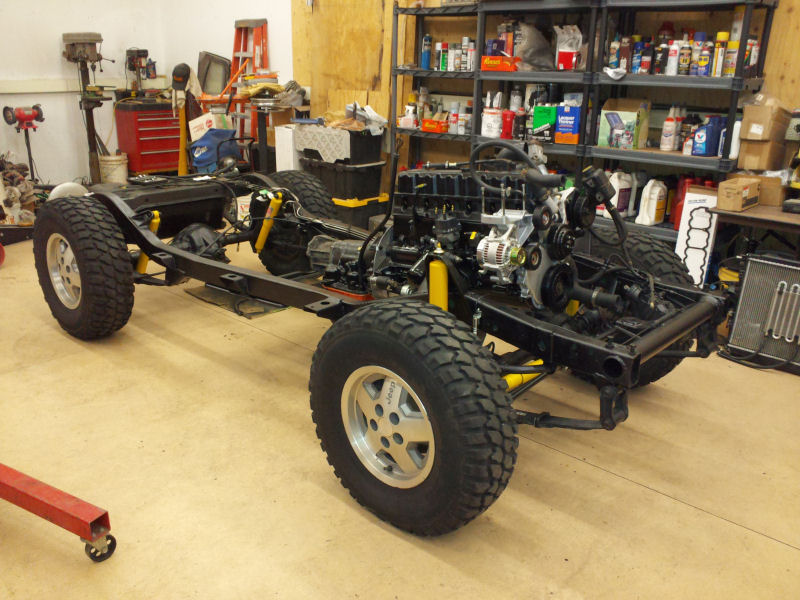
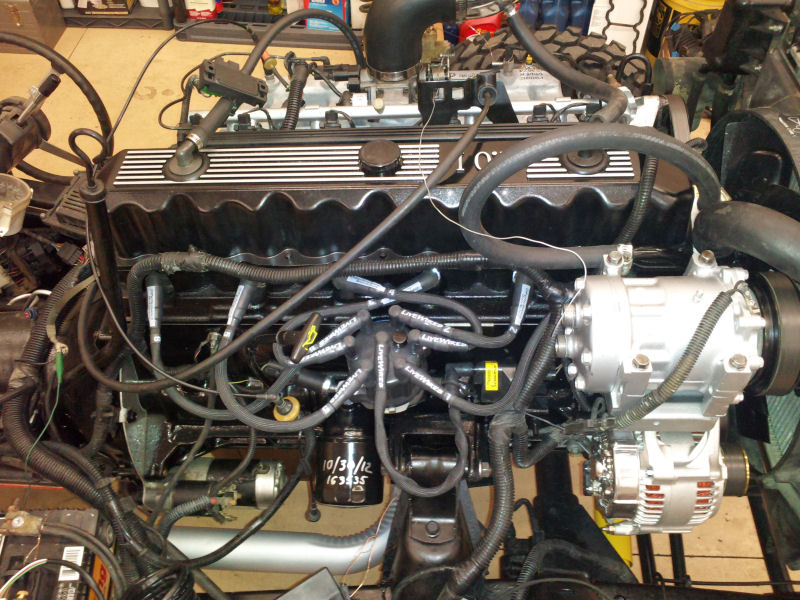
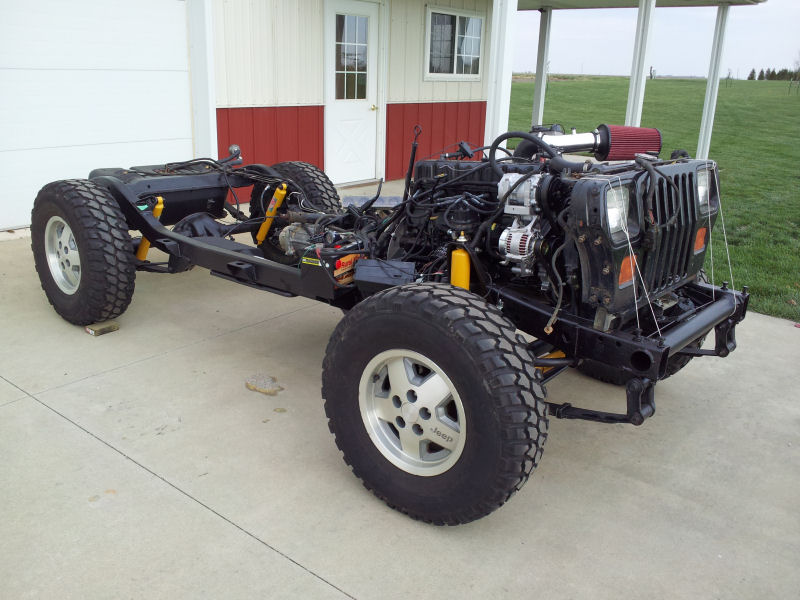
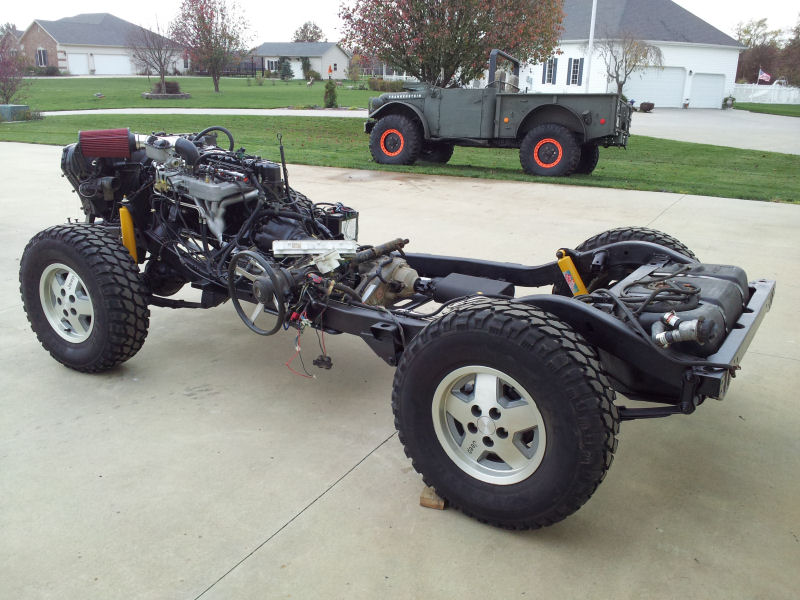
In addition to getting the correct Torque Converter this morning, I also got
the new Push Rods. So they were installed, and I pumped oil around
through the engine after installing them. I then added the comp cams
break-in additive and the rest of the oil and pumped some more oil around
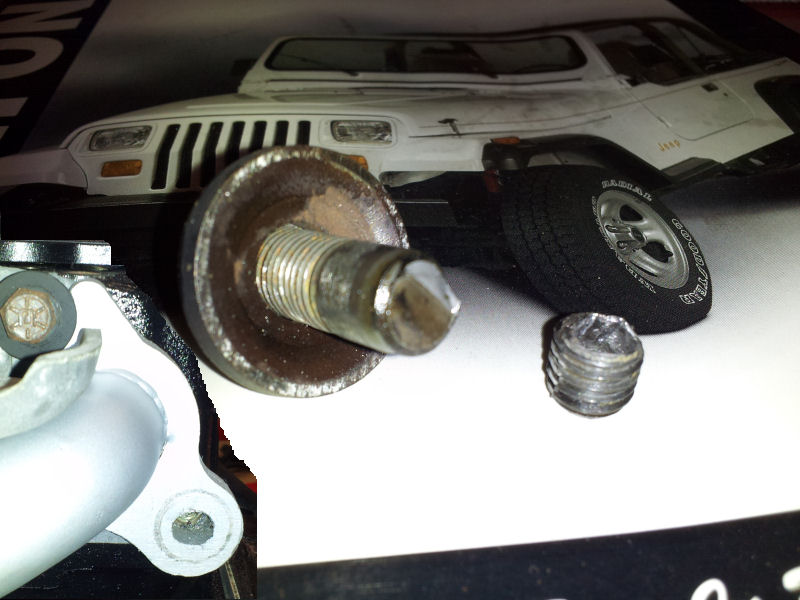
before installing the exhaust and intake. Unfortunately one of the
apparently already cracked exhaust studs broke on me, so I'll have to get a
new one. Need to finish the transmission line installation, radiator
and wiring, then perhaps I can start the engine and do the break-in running
before letting it set while I do the body repairs. 2012-10-22 |


 |
|
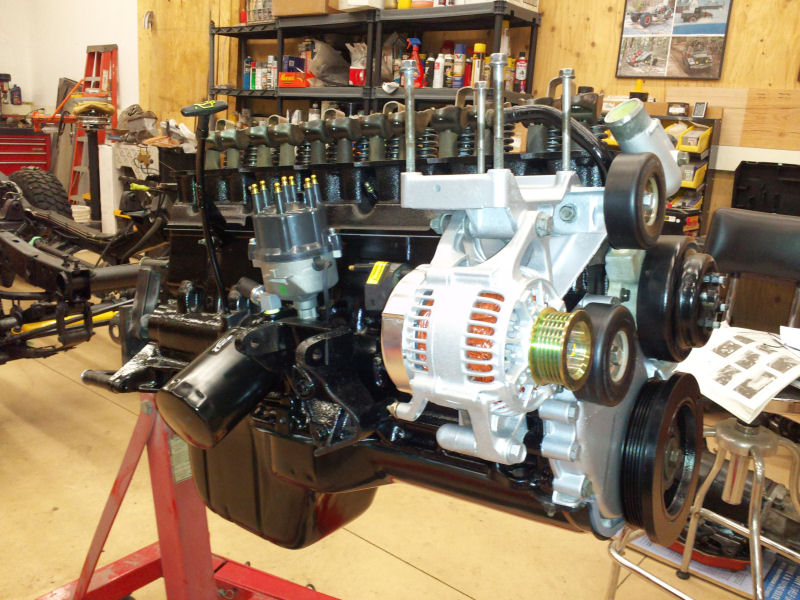
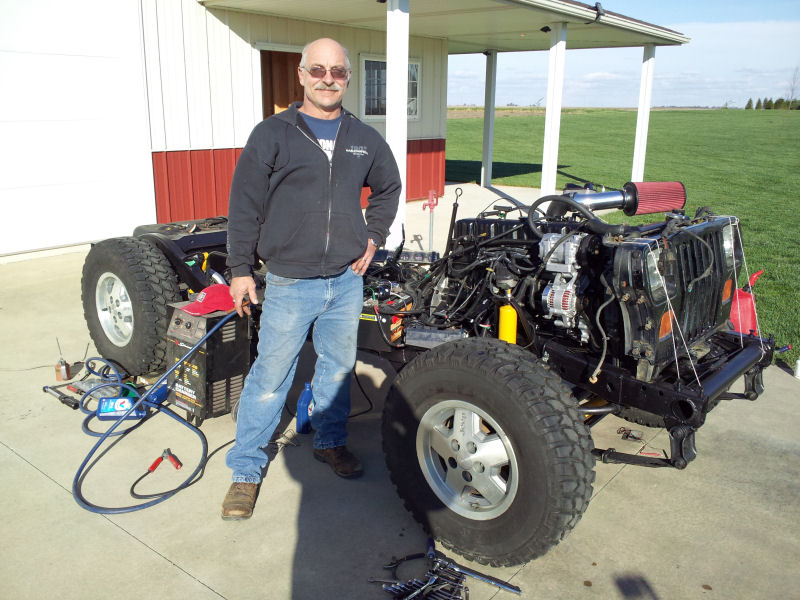
First, a big THNAKS to Bill Gangloff (lucdog). Bill drove down from Peoria
to see me start the engine up. He spent more time on the road than he did
here, but am I glad he came. Turns out I apparently did get the distributor
180º out of time. Either when I did the initial install, or when I primed
the lifters, or when I pre-lubed the engine. Doesn’t matter what, I did it.
After it didn’t initially start, we checked for fuel and spark and had both.
We re-checked all the connections, and tried a few more times before
checking the timing. With the use of an engine pressure tester, we
determined it was out 180º. So I proceeded to correct it. Still didn’t
start, so after some more checking, we discovered I was one tooth off on the
distributer timing. Once more I pulled and re-installed the distributor, and
we tried again. She started up and ran great.
Now we cranked up the RPM to the required 2,000 RPM, and started looking and
checking everything over. Had a momentarily over 210º water temperature that
caused us to lower the RPM, but it corrected itself and was likely an air
bubble, as it didn’t happen again.
About half way through the cam break in, the engine developed a miss. The
Air Fuel Ratio started jumping with each miss. I suspect it might be due to
the old stock spark plugs, and will install a new set of lower temperature
plugs when I change out the break in oil and see if it returns. If it does
I’ll have to start checking the new injectors and plug sires for problems.
Almost everything is new, including the distributor, cap, wires, injectors,
sensors, etc… So with the new Plugs it must be a faulty part, something I
did incorrectly.
While it was running did add additional transmission fluid, and will likely
need a little more when I get a chance to run it through the gears. It now
has 9.5 quarts, and I believe with the deep pan should hold 10+ quarts.
It’s great to have it running with all the work and parts, and after the oil
and plug change and one little exhaust change, I should be ready to start
working on the tub.
2012-10-29 |


 |
|
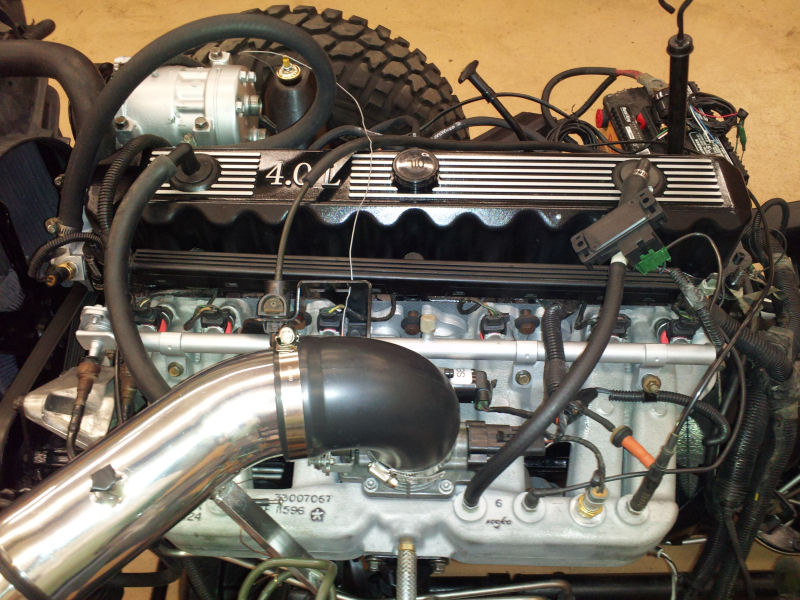
Well after yesterdays engine start and cam break-in, it was time to change
the oil and install the new Spark Plugs. I elected to do the break-in
with the old plugs figuring there might me some oil or other burn off that I
didn't want to harm the new plugs. Not sure it was a wise idea, but I
did it. As you can see in the first picture, Cylinders 3 & 4 (and
partially #6) either weren't cleaned enough, or have problems and likely
caused the miss the engine developed during the break-in. In the
second picture you can see the cooler heat range NGK BKR6E-11 (RC9YC4) Spark
plug next to one of the old Champion 4412's. (RC12LYC). While I had
the plugs out I also did a room temp wet engine compression test. The
results are as follows:
1 - 183psi
2 - 182 psi
3 - 186 psi
4 - 183 psi
5 - 185 psi
6 - 183 psi
All in all only a 4 psi delta, and what I believe to be good numbers for a
9'ish Compression Ratio Engine. I also checked (once I knew you could
and how) checked for any Engine codes, and only found batter disconnect code
which was expected. I changed the engine oil and filter and added the
ZDD Plus Oil Additive. I rechecked the manifold torques, and noticed
two of the exhaust pipes had a sign of what looked like oil run oil of the
pipe to flange area. It's probably from the small oil leak that
developed on the valve cover while running during the break-in. While
the engine was running (break-in) I re-torqued the valve cover and believe I
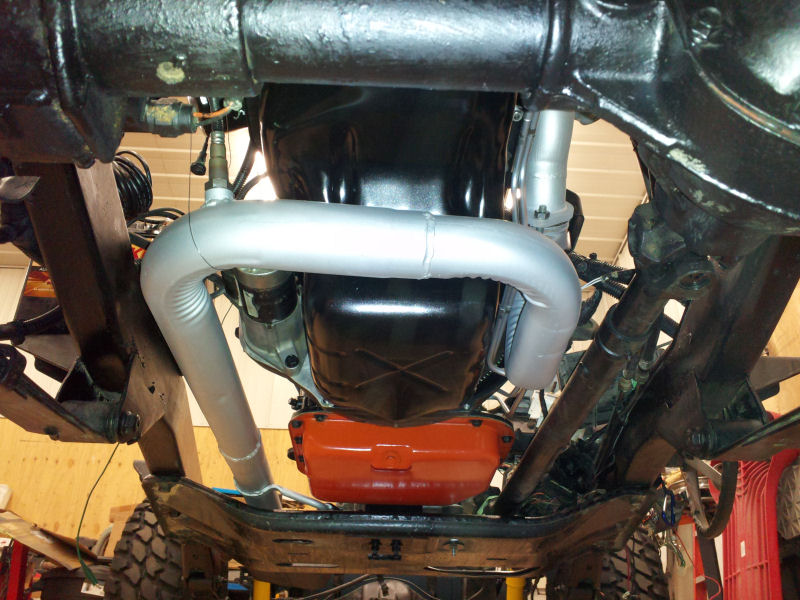
have the oil leak stopped. I also removed and extended the exhaust
pipe to get the muffler to clear the skid plate, and further investigated
the stock tail pipe position. I'll probably take it back, and end up
having one made that fits better and is 2.5", not 2.25" in diameter.
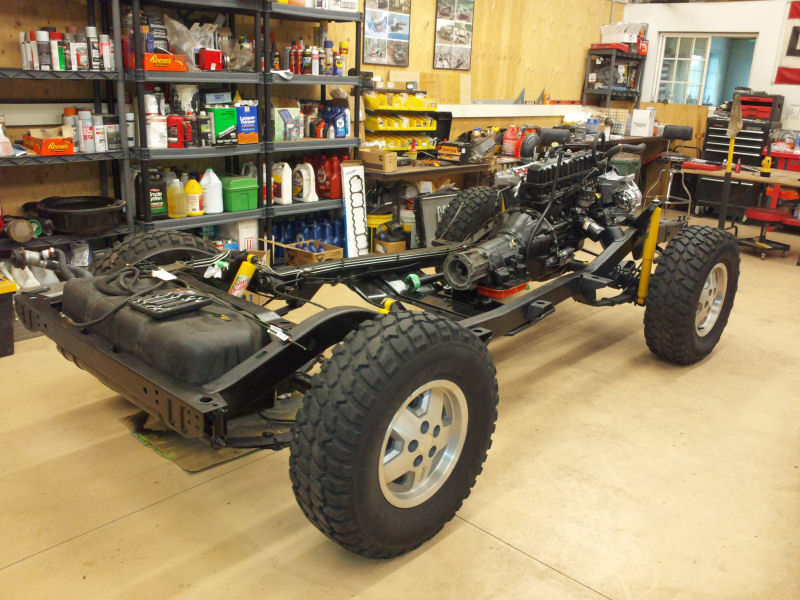
Now with the gas tank straps that arrived this afternoon, I can paint and
install them and have the chassis done with the exception of drive shafts.
2012-10-30 |


 |
|
Took advantage of probably one of the last nice days to wash off the
weekends mud off the M37, and roll out the YJ to start and run the engine
again. The intent was to let the engine run a good 30 minutes and see
if the miss returned, and after almost 50 minutes, it did not. The
engine still runs and sounds strong, but when you rev it the Air/fuel ratio
jumps around it it blows out some smoke. It still smells rich, but the
A/F ratio says different. Fluid levels are all holding steady and
looking clean. 2012-11-01 |
|
|
|
|