


1993 Jeep Wrangler (YJ)
██ │││││││ ██
■ │││││││ ■
(Yea, I know square headlights)
The Body Work
| ↓ Click the Image to Enlarge ↓ | ||
|
|
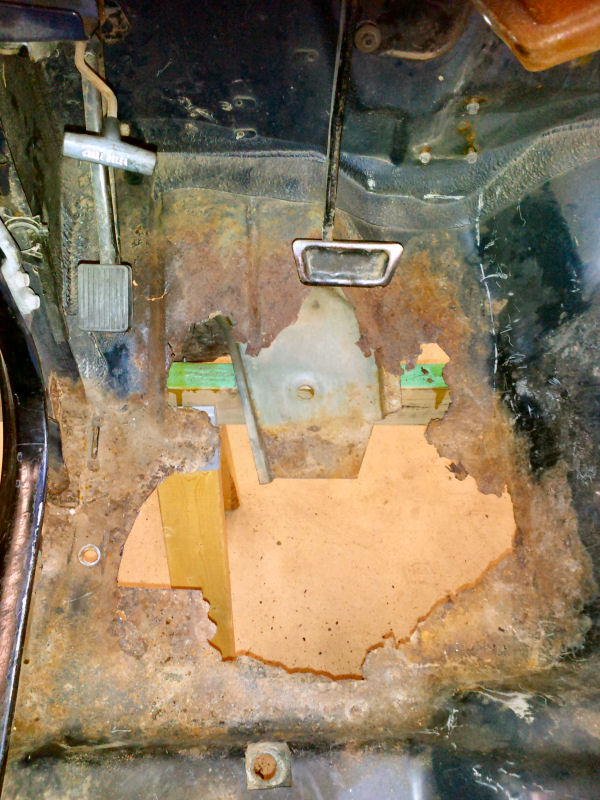
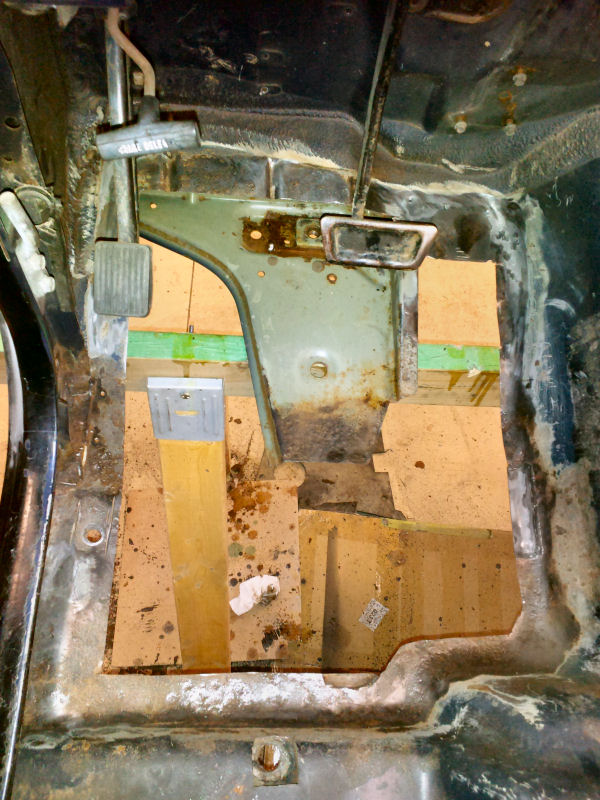
Started the Body work today, and started off with the driver side floor, as it was the biggest hole in the body. I picked up a cheap patch panel and cut out the the rusted floor material and the rust at the body side as well. I've cut the patch panel down to fit and cleaned the floor. Not to start welding in the patches. 2012-11-02 | |
|
|
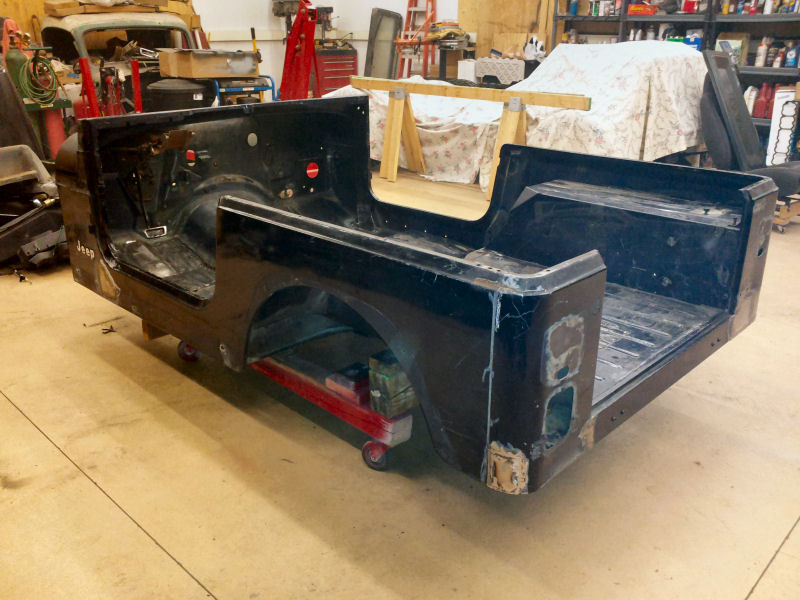
Spent the afternoon, cleaning out the tub, and applying some weld thru primer to the drivers floor. Next I started pulling off the tub interior items, rails, seat mounts, wiring, heating system, etc... As you can also see I have it on a set of wheels for easy movement and better side access. 2012-11-03 | |
|
|
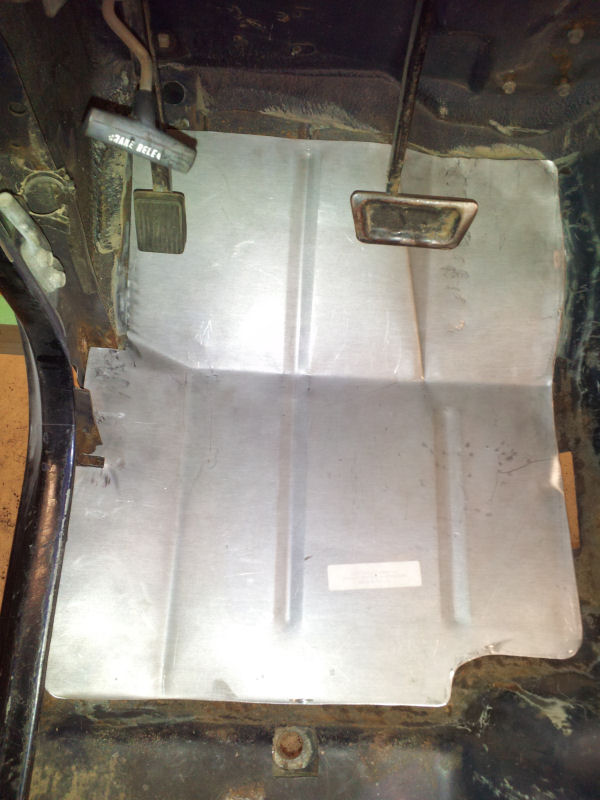
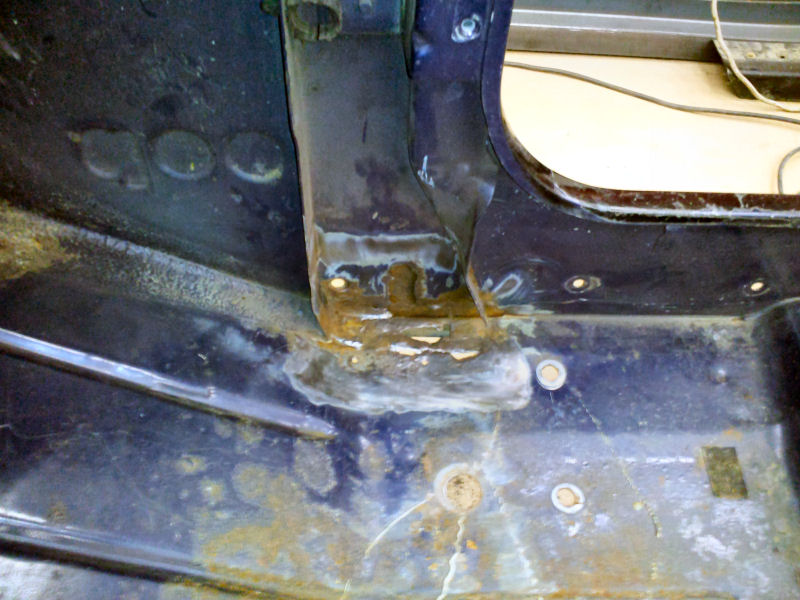
Welded in the floor and door support patches. Now to patch the outer body panel, and then move to the rear of the tub for those patches. 2012-11-04 | |
|
|
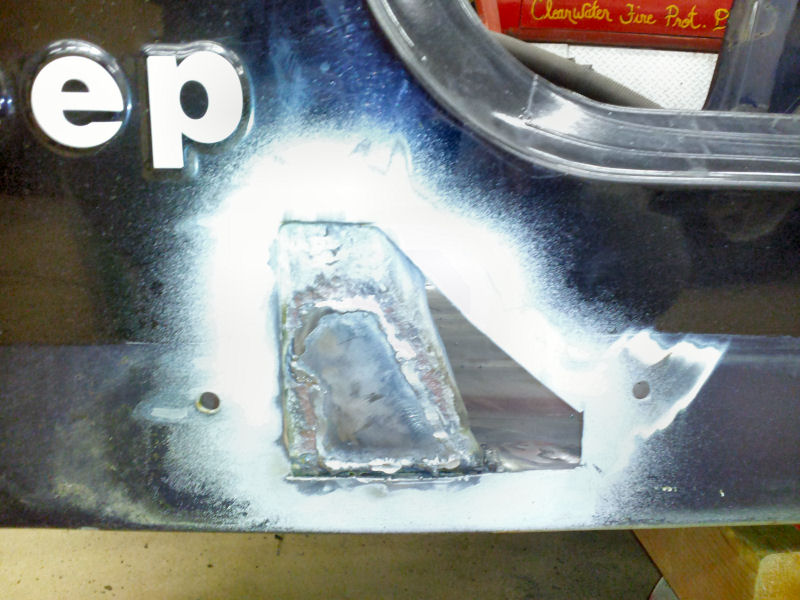
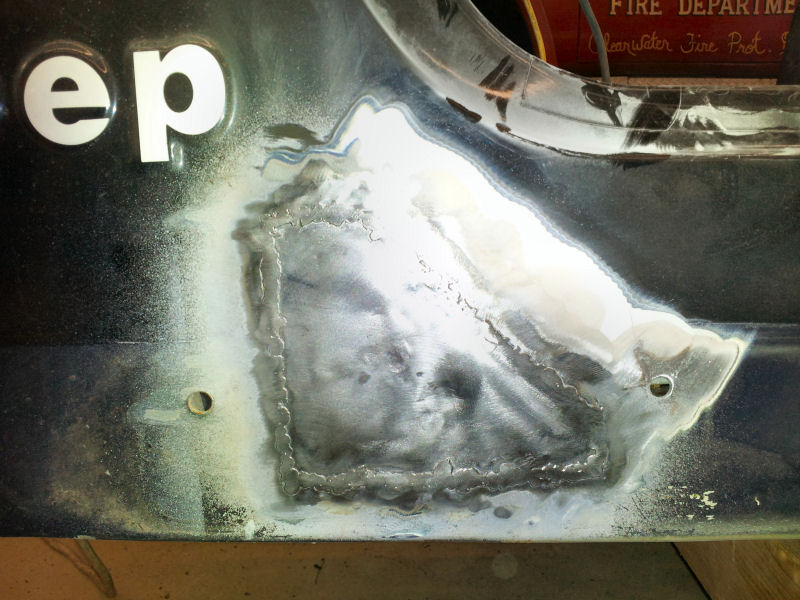
Just a little work today. I fabricated and welded in the outer panel patch for the drivers side door support area. I also removed the cracked/broken and cleaned up the cowl areas. 2012-11-05 | |
|
|
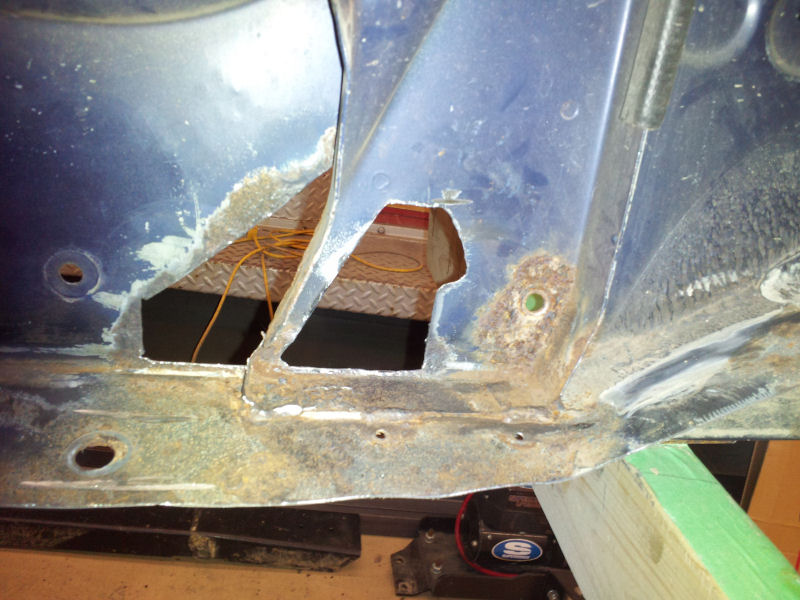
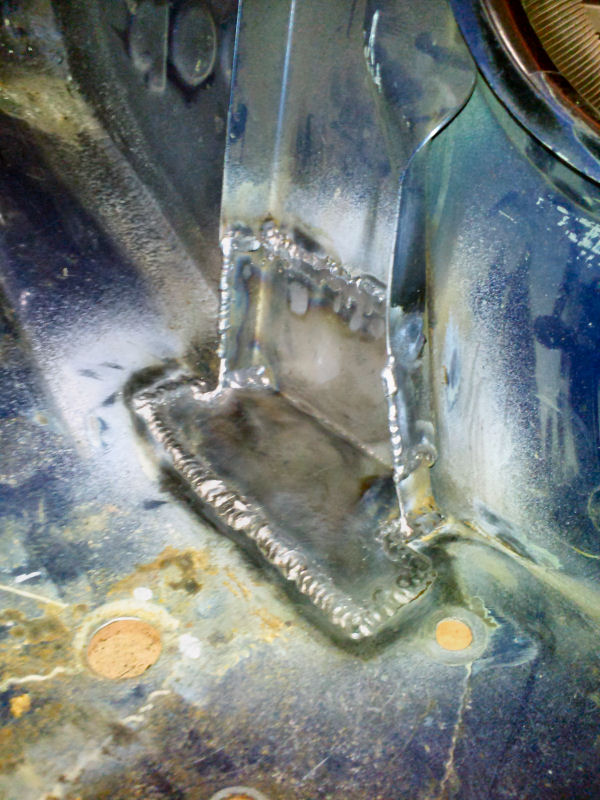
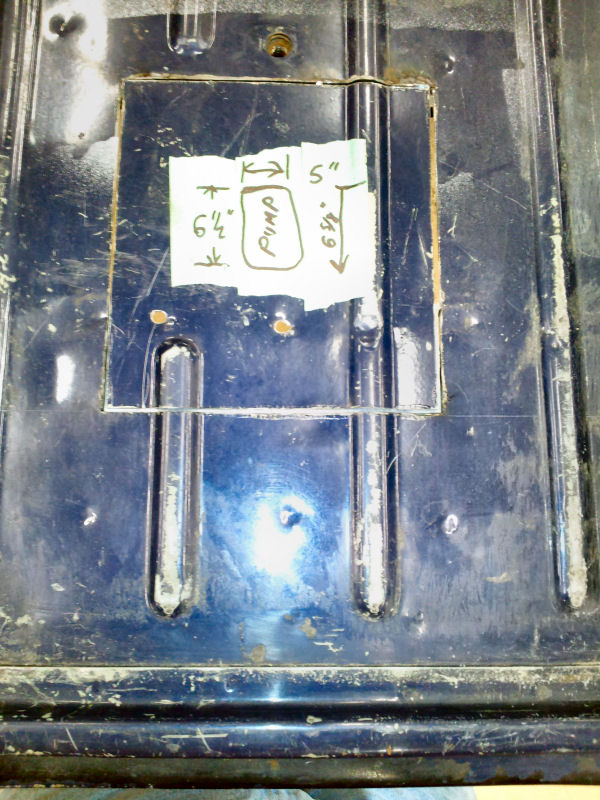
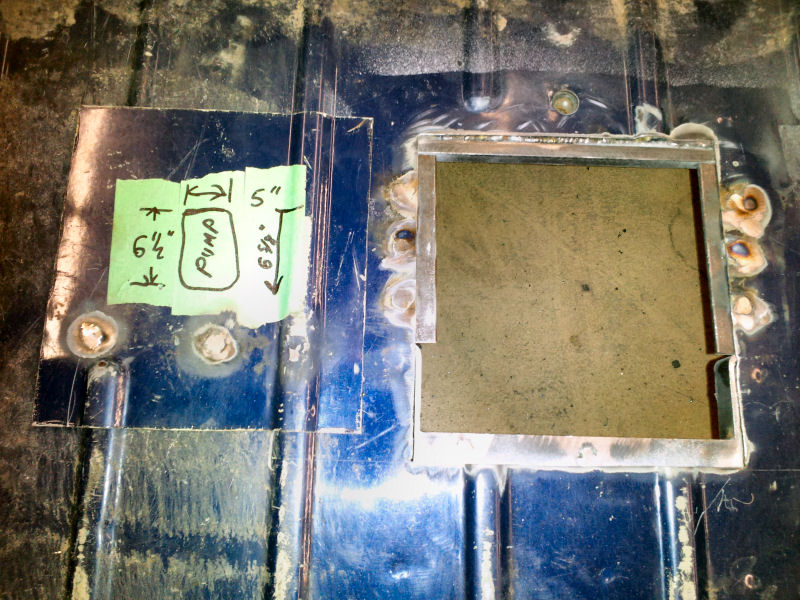
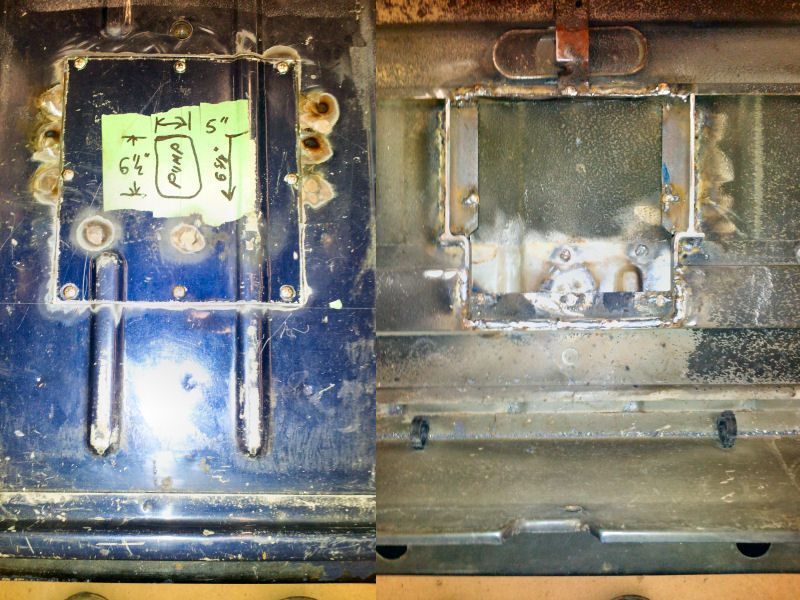
Been busy with Deer Season, Thanks Giving, Family and a few other things going on and have not had much time to work on the Jeep lately. I did get in a little work on the tub though. Finished the passenger side lower door support repair, and worked on the fuel pump access panel some more. Looks like my original plan of driving by Christmas is out the window, oh well, all is good though. 2012-11-30 | |
|
|
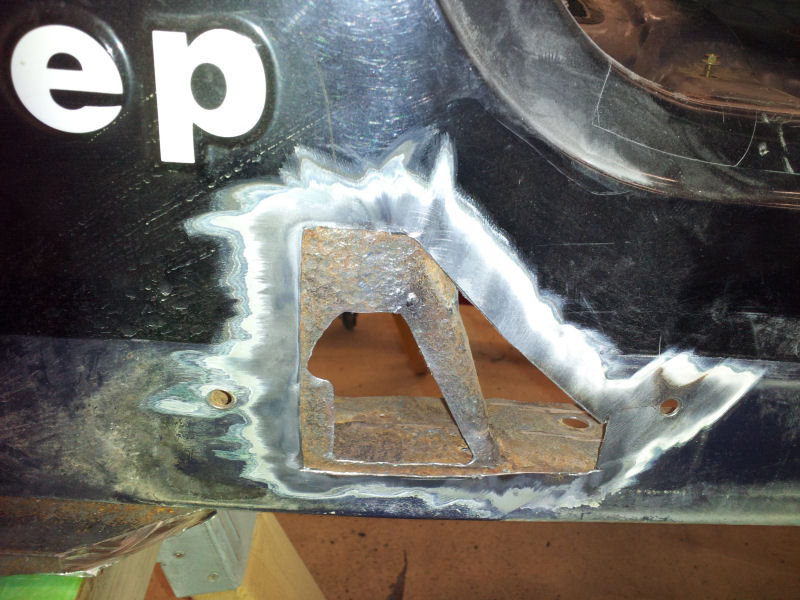
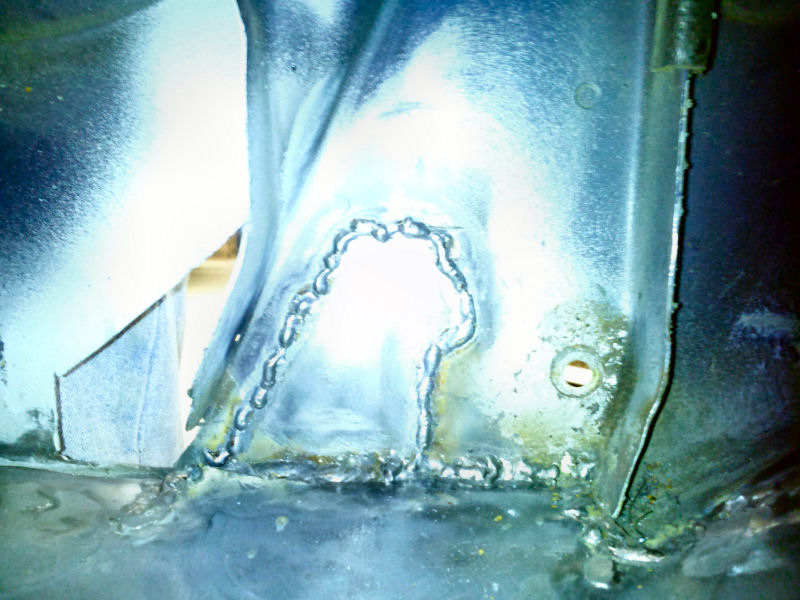
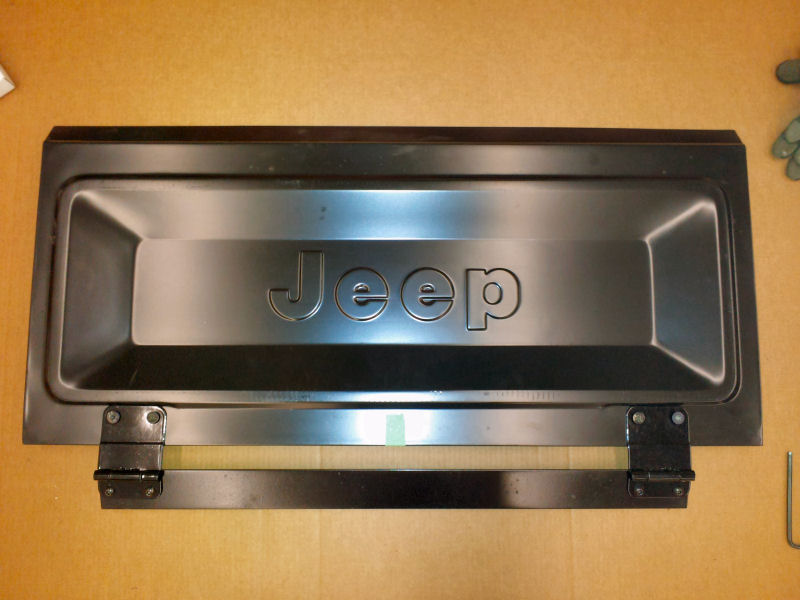
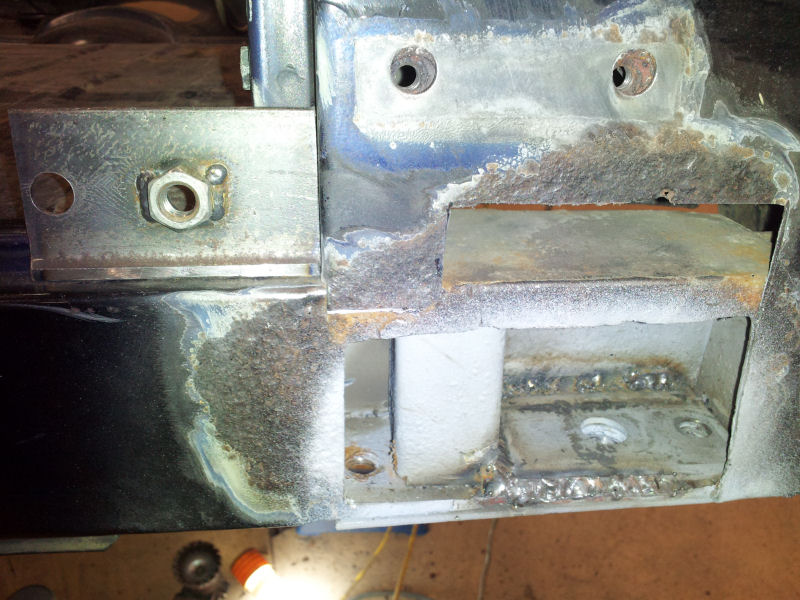
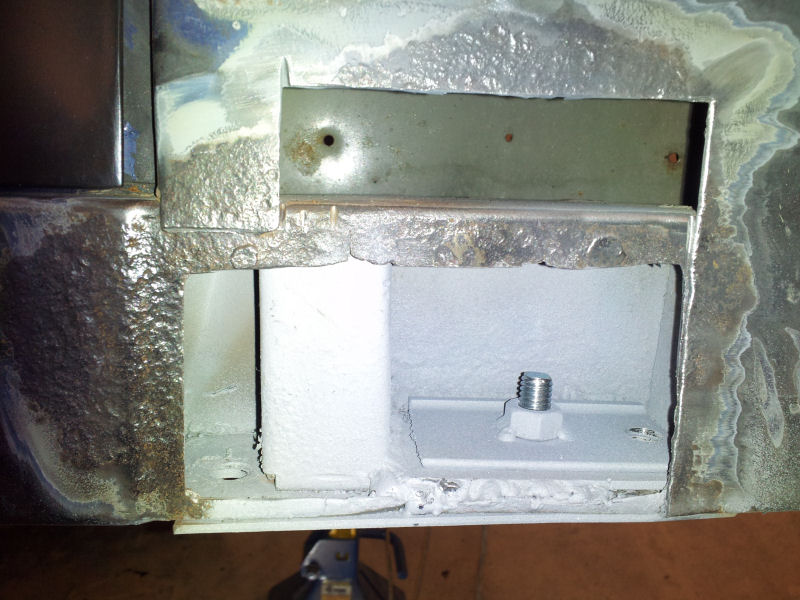
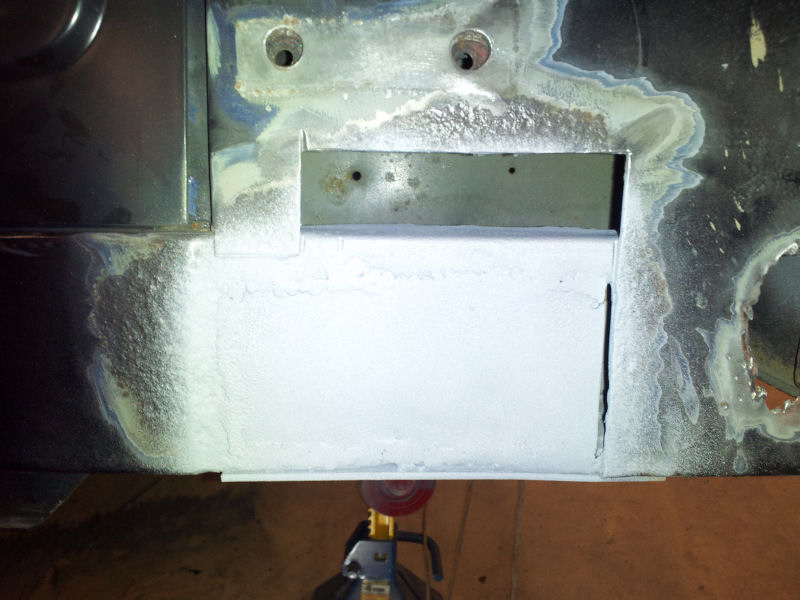
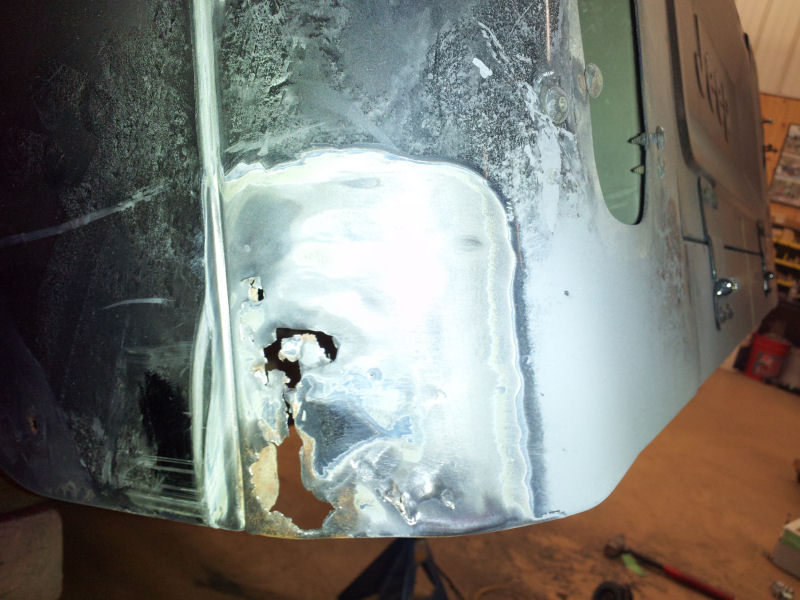
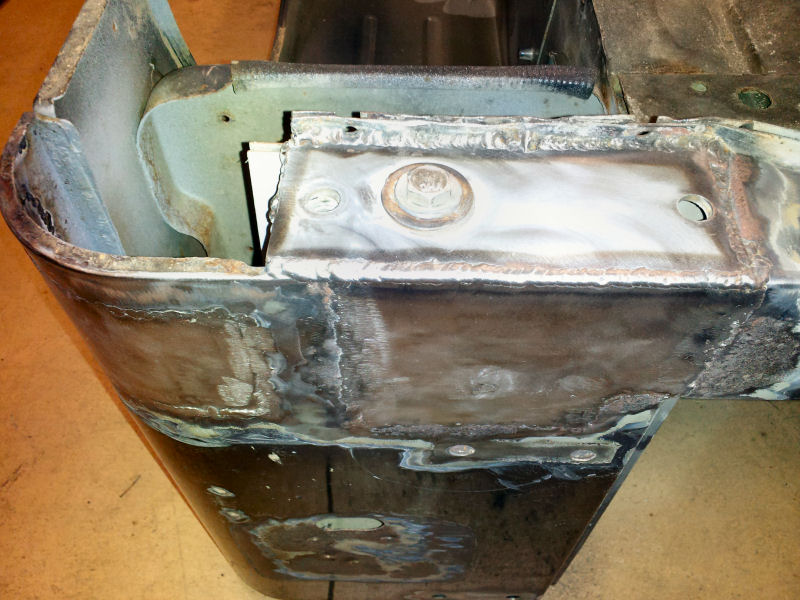
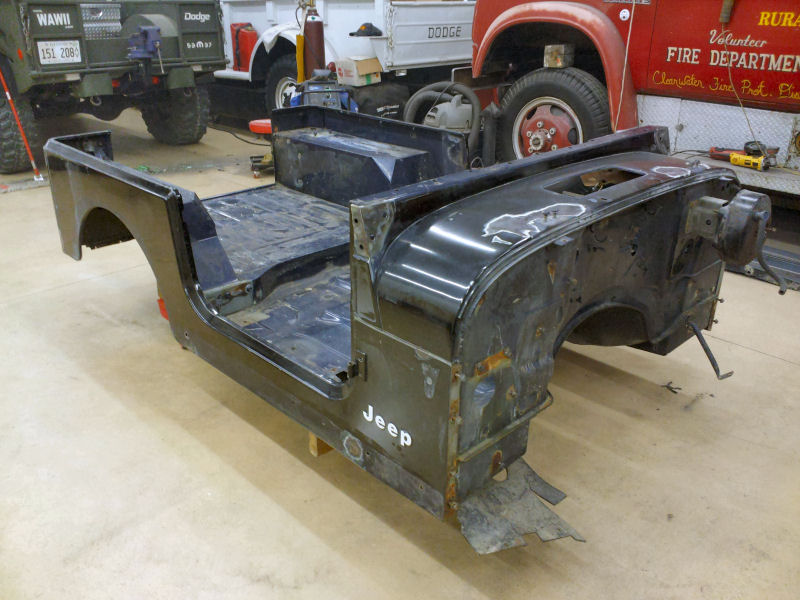
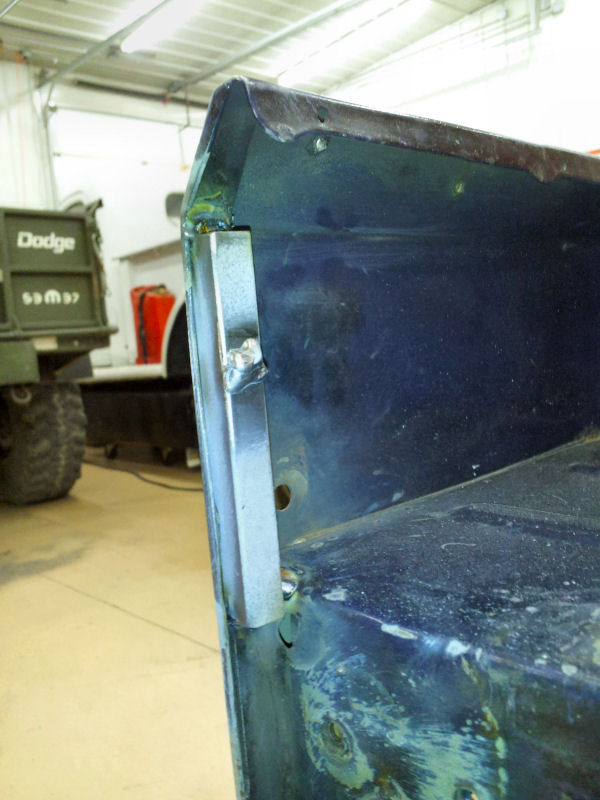
Back to doing a little work on the Jeep. I made a reinforcement to install inside the rear tub body cross member to mount the CJ tail gate to. I was able to slide it in and through the rust hole on the passengers side before doing it's repair. I also reinforced/repaired the right rear tub mount and started closing off the rust hole. 2012-12-10 | |
|
|
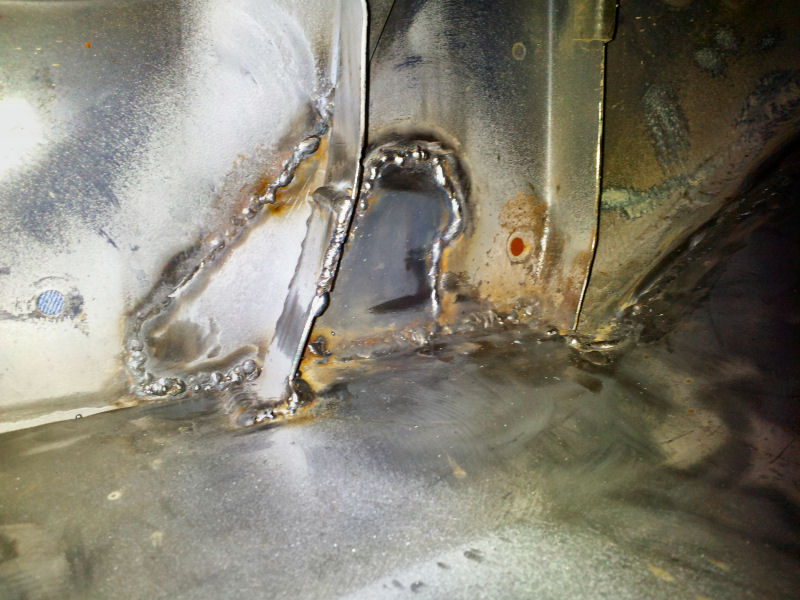
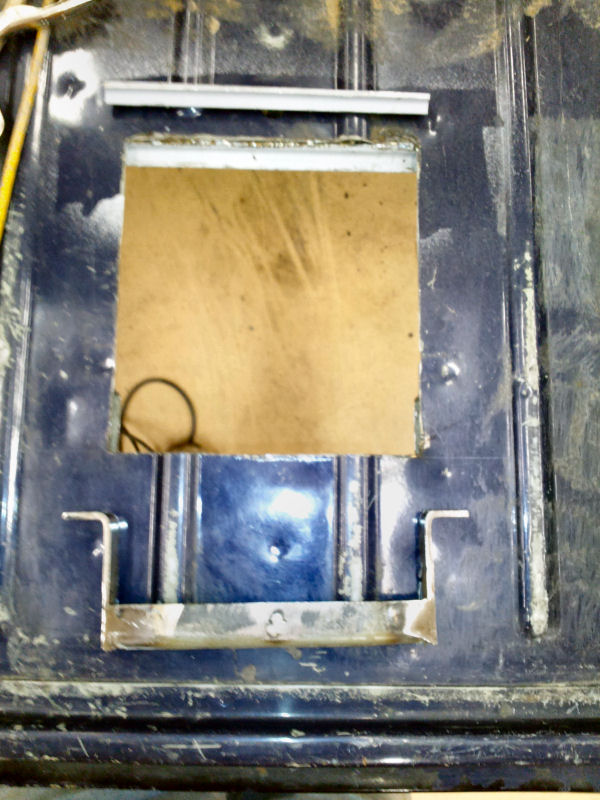
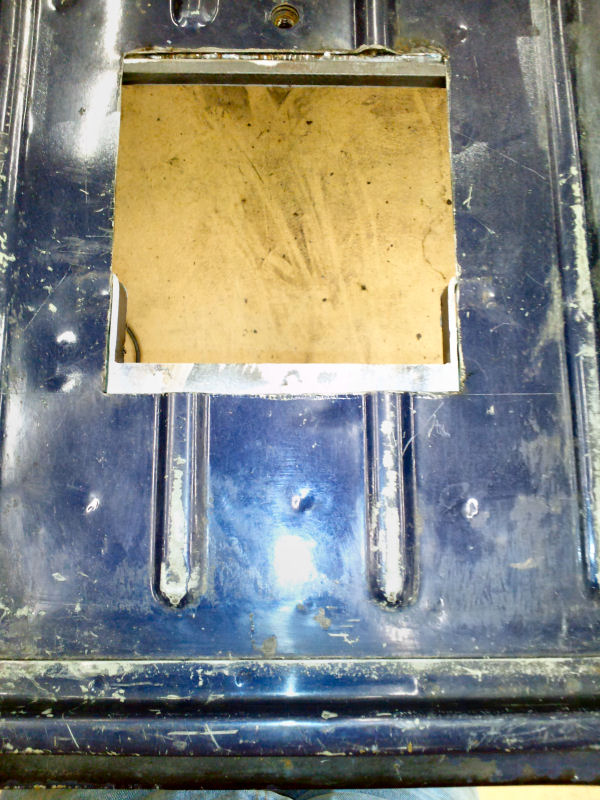
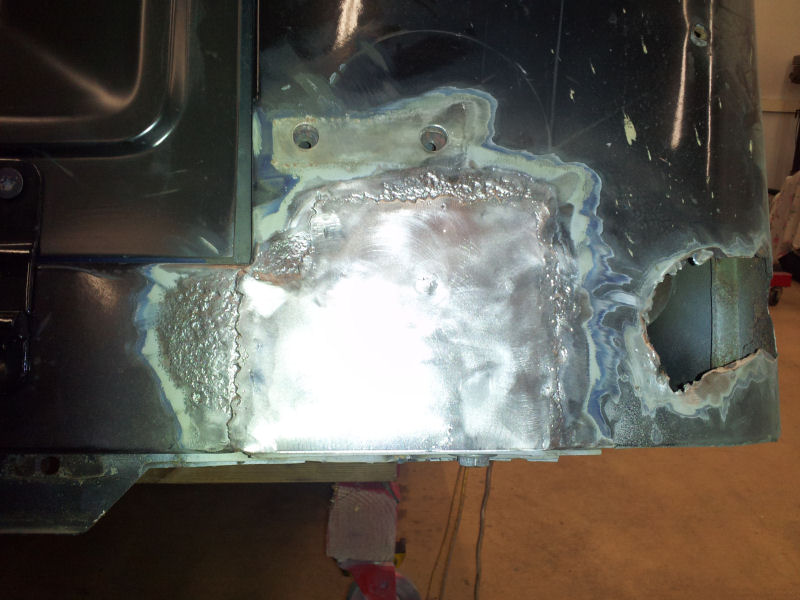
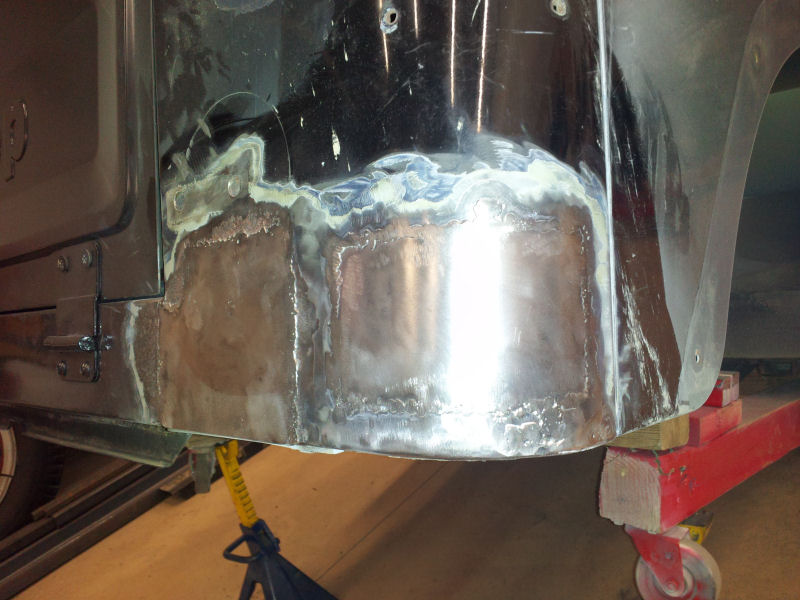
Started the exterior rear corner repair. Finally used my body panel clamps to hold the patch panels in place while I spot welded them in. They work pretty good, but my thin sheet metal welding skills aren't the best. I will need to finish welding them from the back/bottom side, but before I flip the tub, I spot welded in the final fuel pump cover side flanges. After a little more welding and some body filler the tub exterior is getting closer to sanding and painting. 2012-12-11 | |
|
|
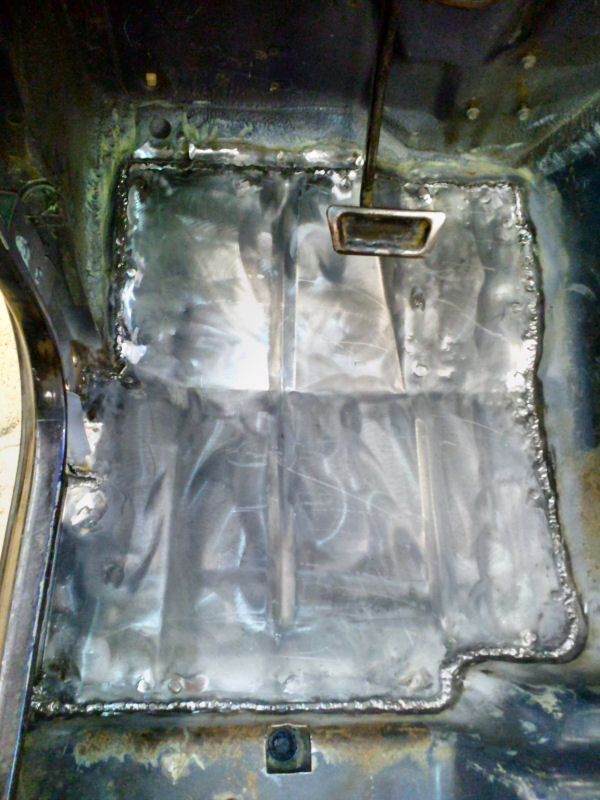
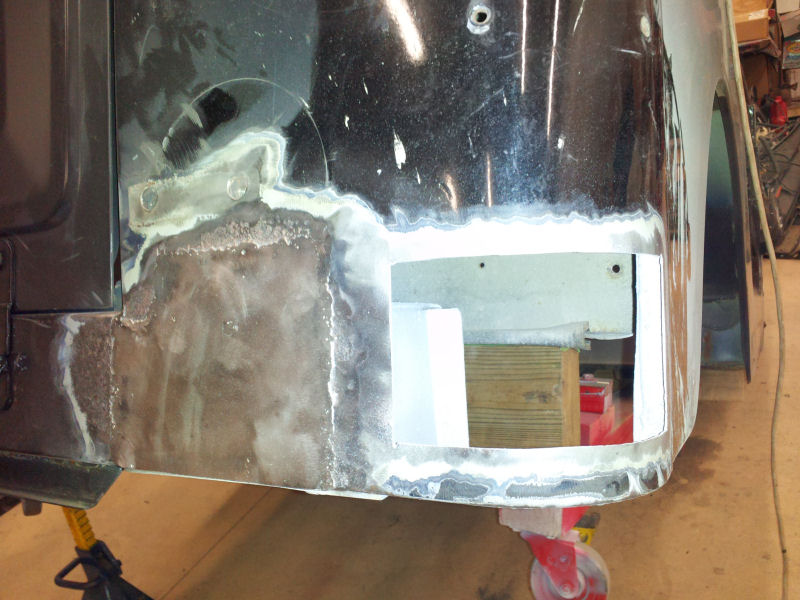
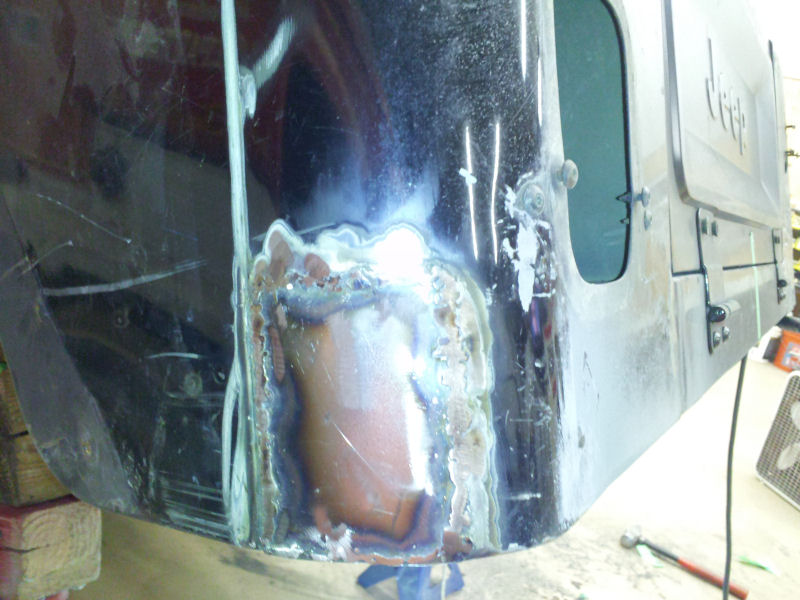
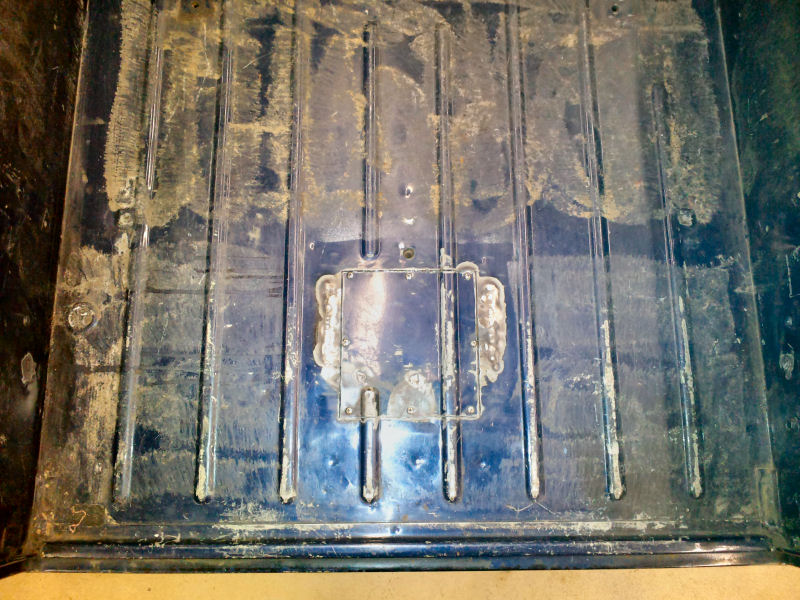
Finished attaching and welding the Fuel Pump Access Cover. Also welded the bottom side of the rear tub mount reinforcements I made. 2012-12-16 | |
|
|
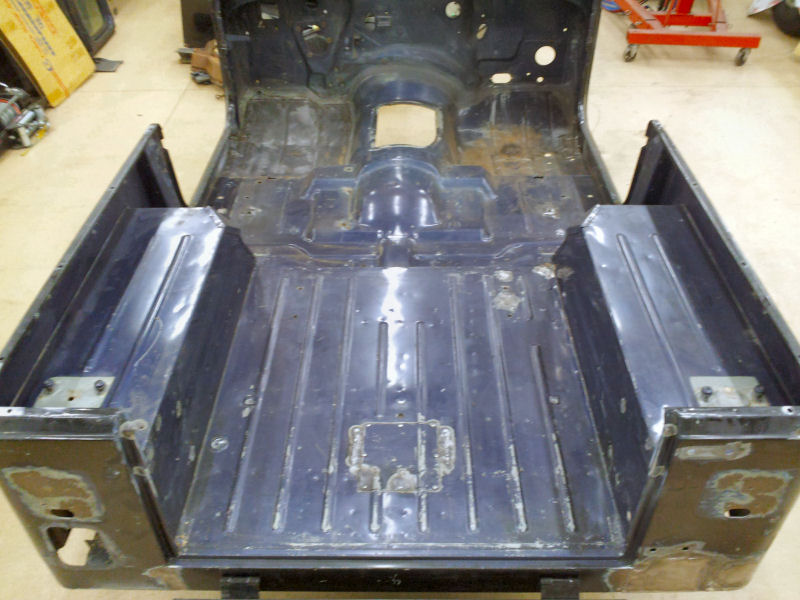
Finished the bottom side welding, and patching a few more places that I found. Next to remove some broken dash bolts, lower door hinges, and the brake pedal assemble to start prepping for paint, etc... 2012-12-17 | |
|
|
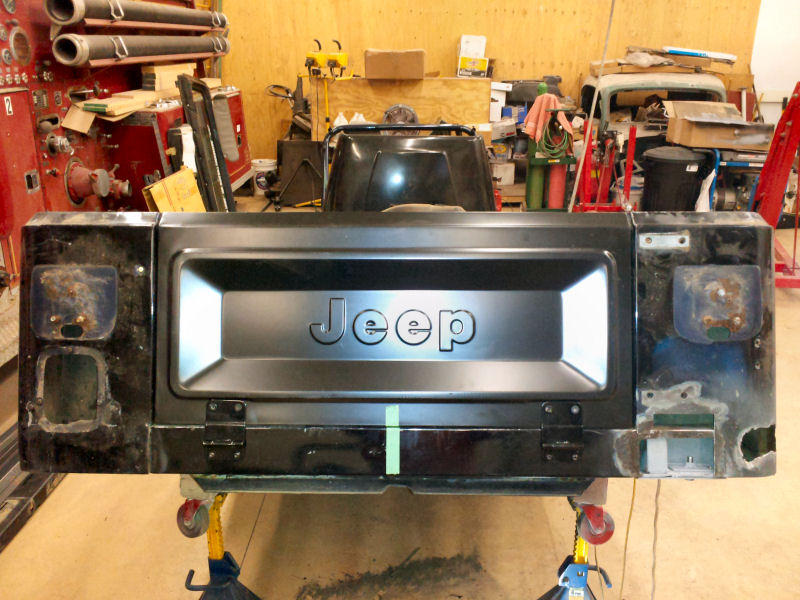
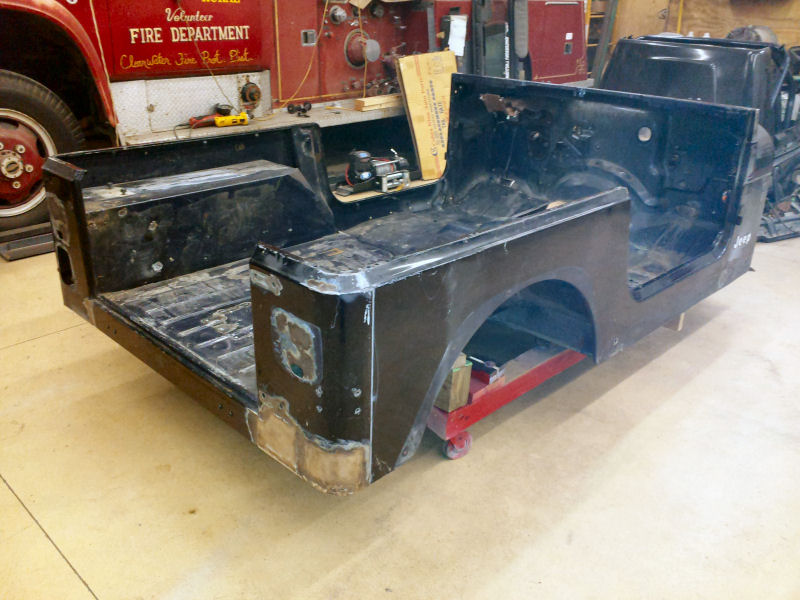
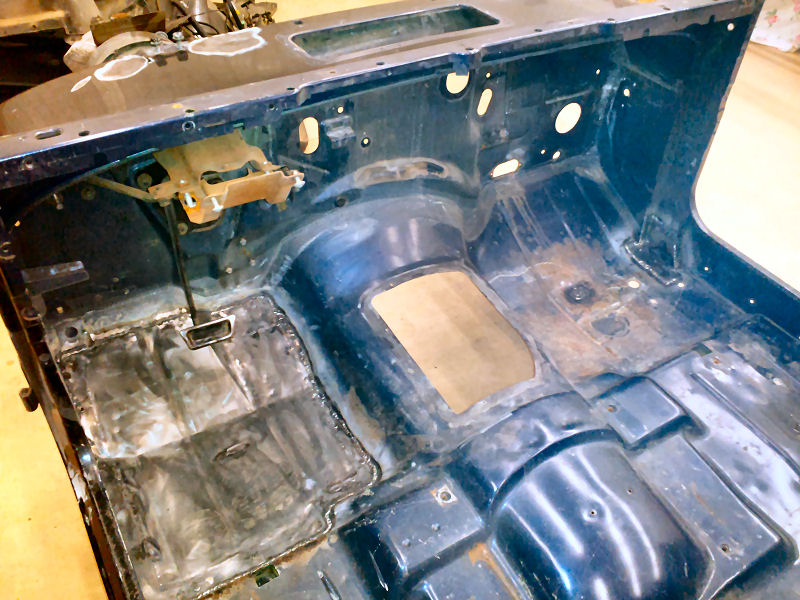
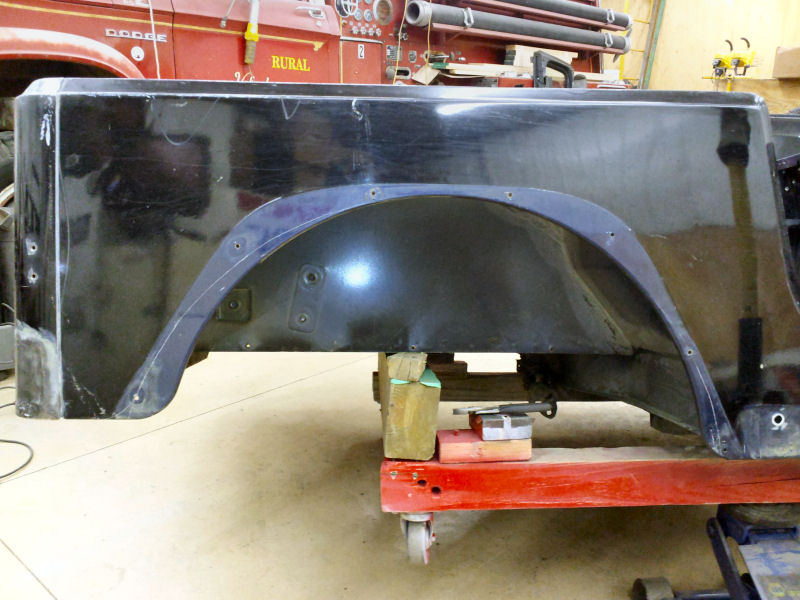
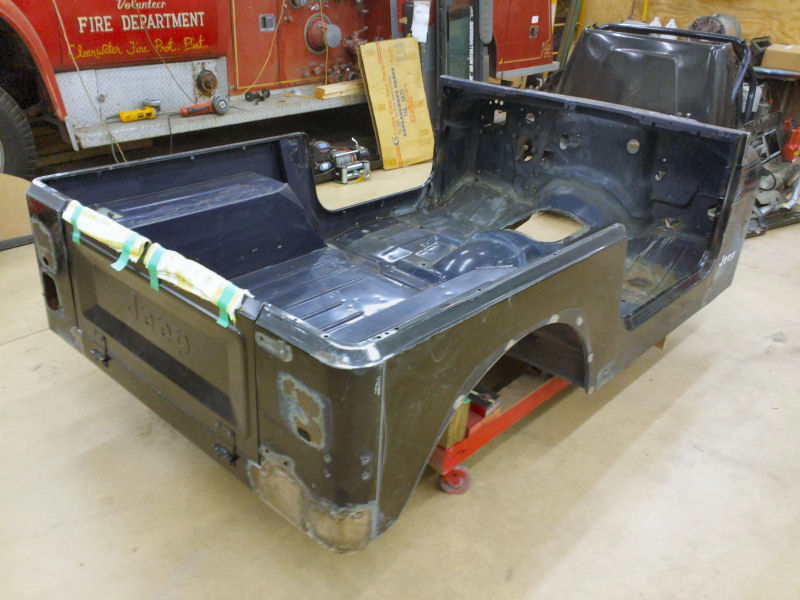
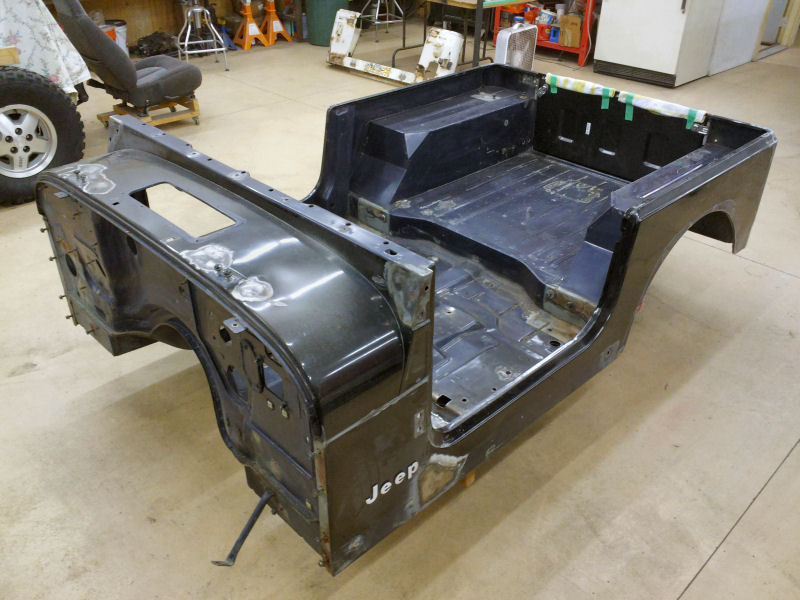
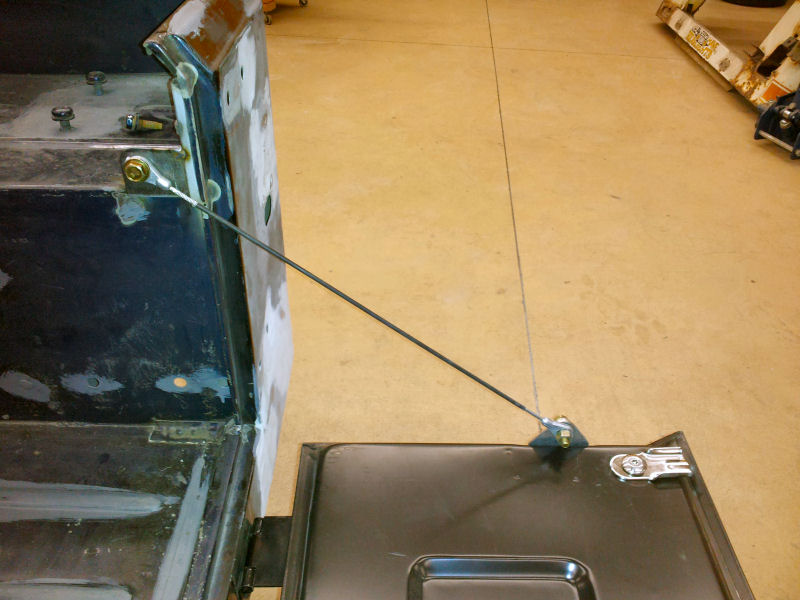
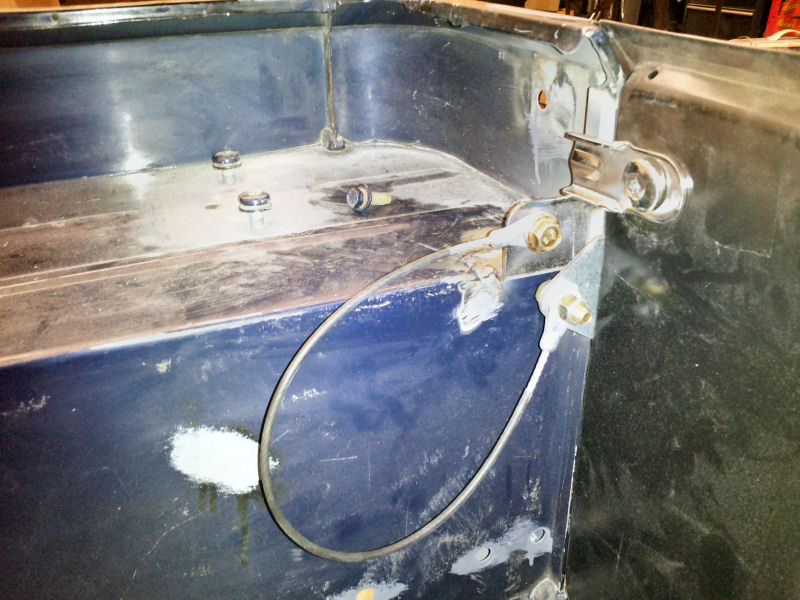
Well, let me tell you, cleaning out the old carpet glue was no easy task. The glue is almost all gone now, and I've de-greased the inside of the tub and the engine side of the firewall as well. I've done the same trim/opening of the rear wheel wheels that I did to my brothers Jeep. This will allow easily up to 35" tires with out further trimming, so my current 31" might look a little out of place. I also fabricated the tailgate latch brackets from some 1/2" tubing and adding a weld to snap the latches against. The only metal work left on the tub is to fabricate/attach the tailgate straps. then I can prime, and fill the body spots in preparation for paint. 2012-12-19 | |
|
|
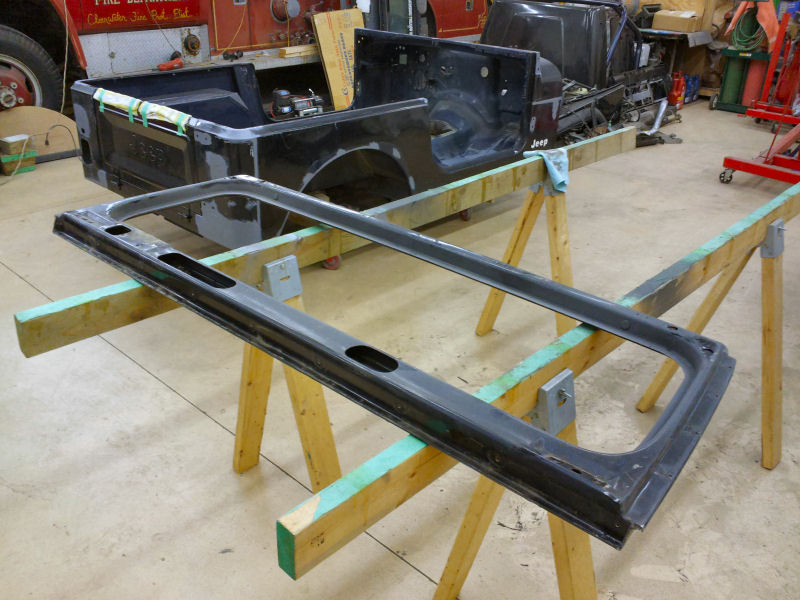
This afternoon a little more cleaning, and then some bare metal priming. I also removed the glass out of the replacement windshield frame and getting it ready. 2012-12-20 | |
|
|
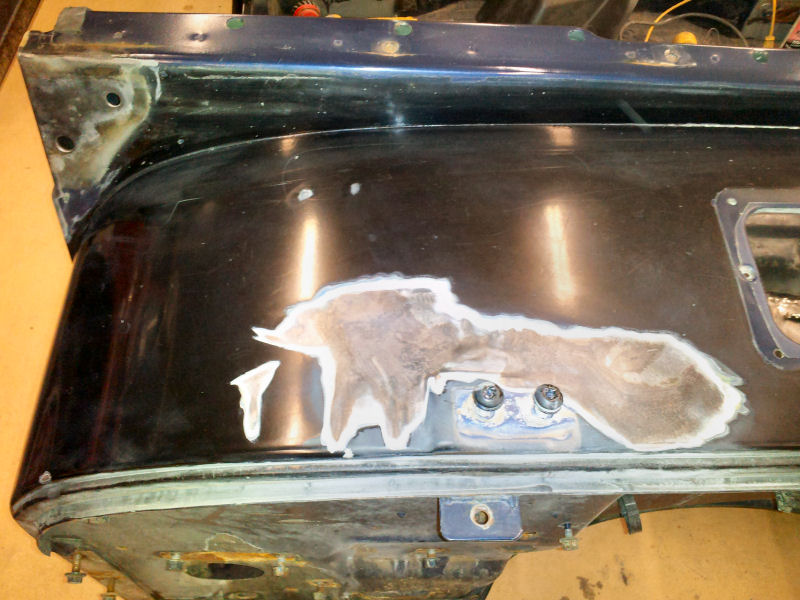
Started the filling and sanding, oh the dust. At least it's not as bad as when I did this on the '46 Power Wagon. 2012-12-21 | |
|
|
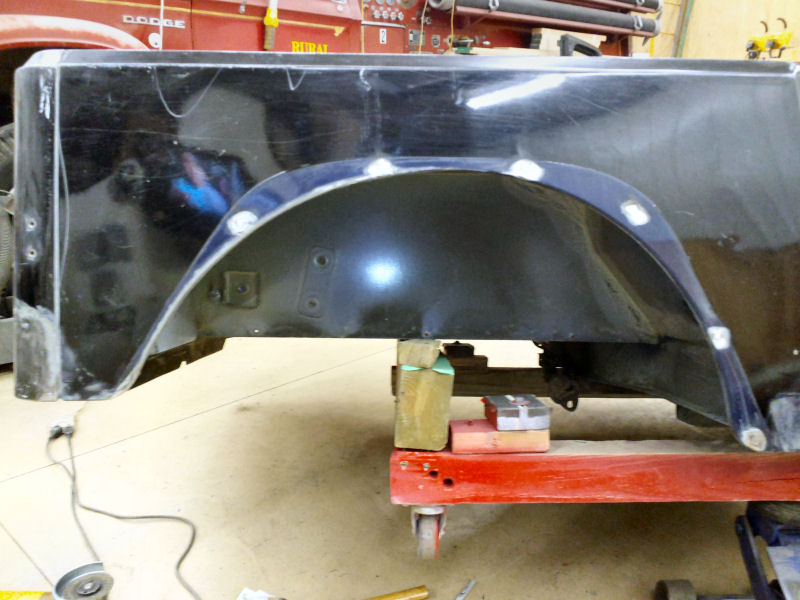
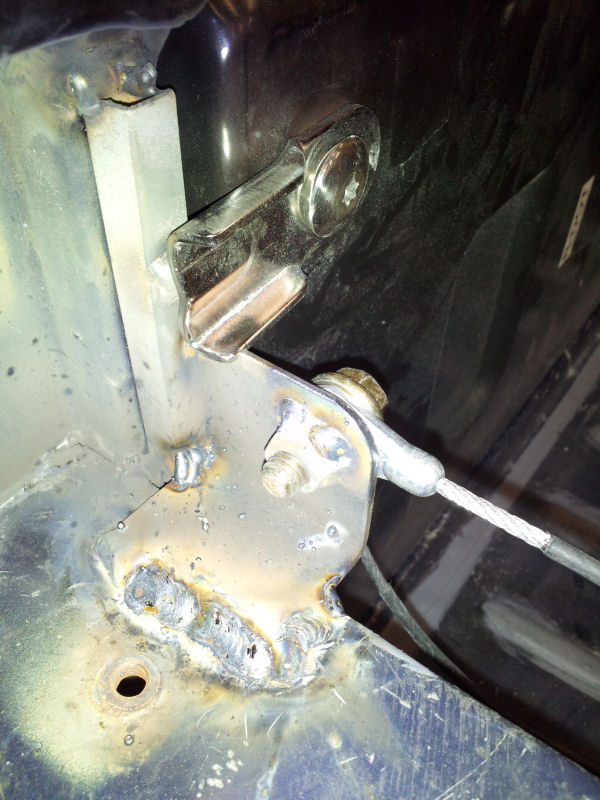
Spent a little time fabricating the tailgate cable brackets and attaching them. Need to finish welding them on and cleaning the welds and priming, but the work as planned. I also finished the body filler and first tub sanding. Next is to apply the fill primer and finish the sanding in preparation for paint. 2012-12-22 | |
|
|
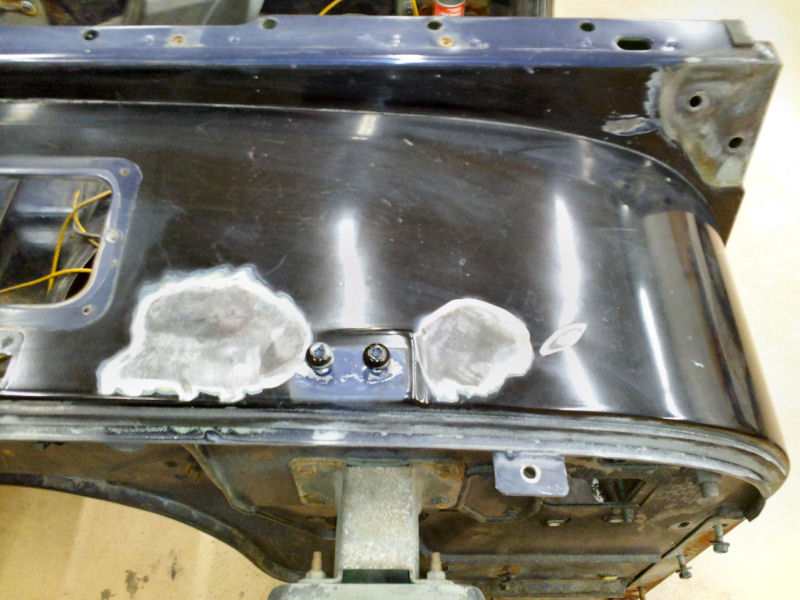
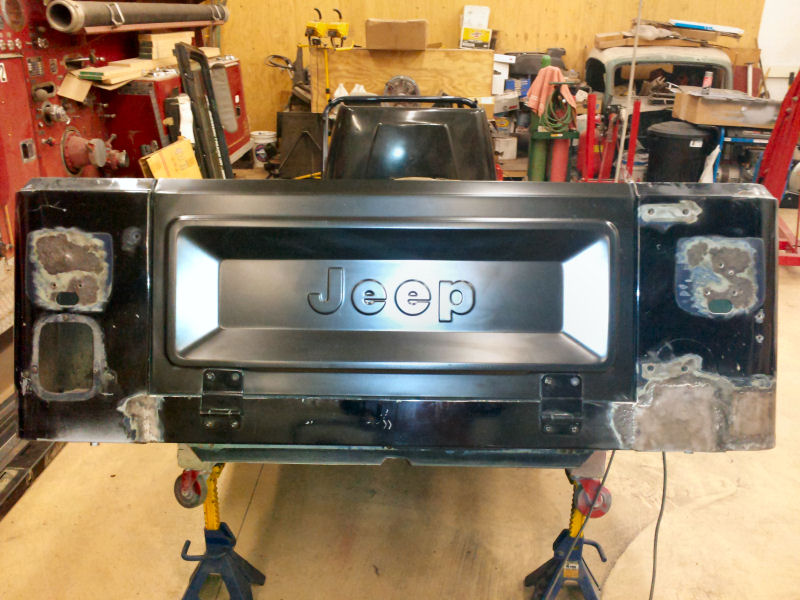
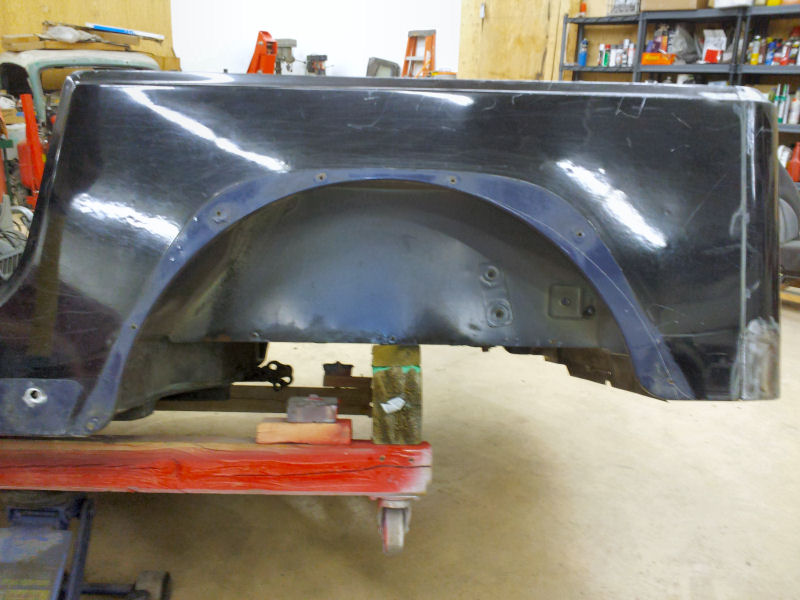
Well, the Tub is sanded and almost read for paint. A couple of spots that needed a little more filling to be sanded and I still need to sand the firewall. Then the bottom can be re-undercoated and the tub can be painted. 2012-12-23 | |
|
|
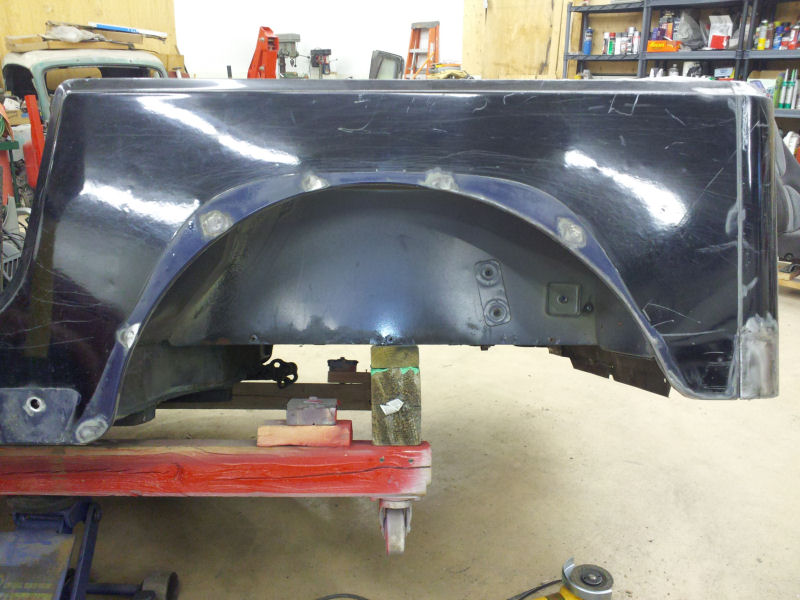
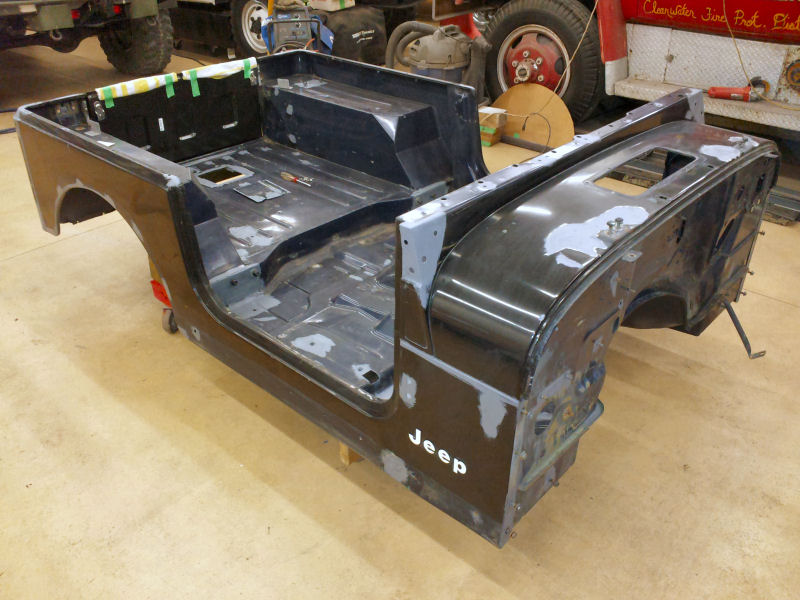
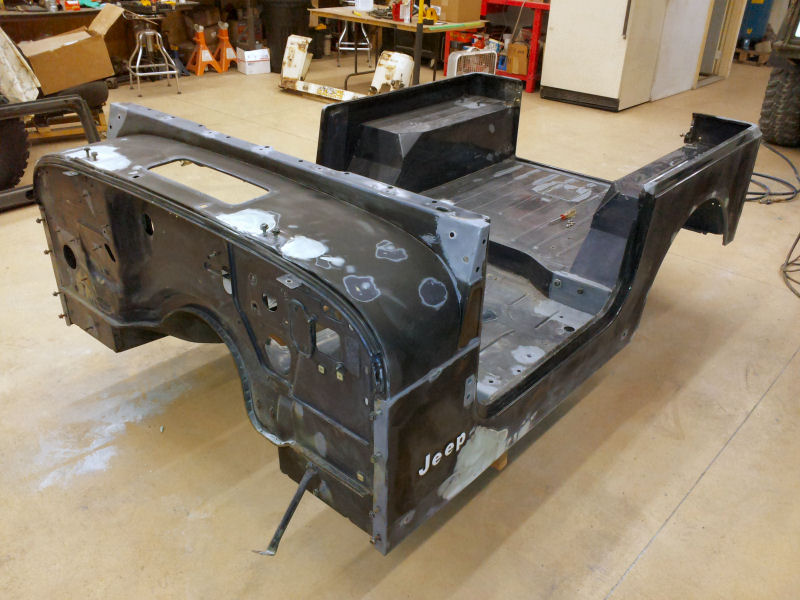
The Tub is done and loaded for the trip to the Paint Booth when it's available. I've also got the Hood, Windshield and Tailgate sanded and ready for paint as well. Next comes the grill shell. 2012-12-26 | |
|
|
The grill is disassembled, cleaned, initial sanding, and fill-primed. Now for it to dry and start sanding again so it's ready for paint. 2012-12-27 | |
|
|
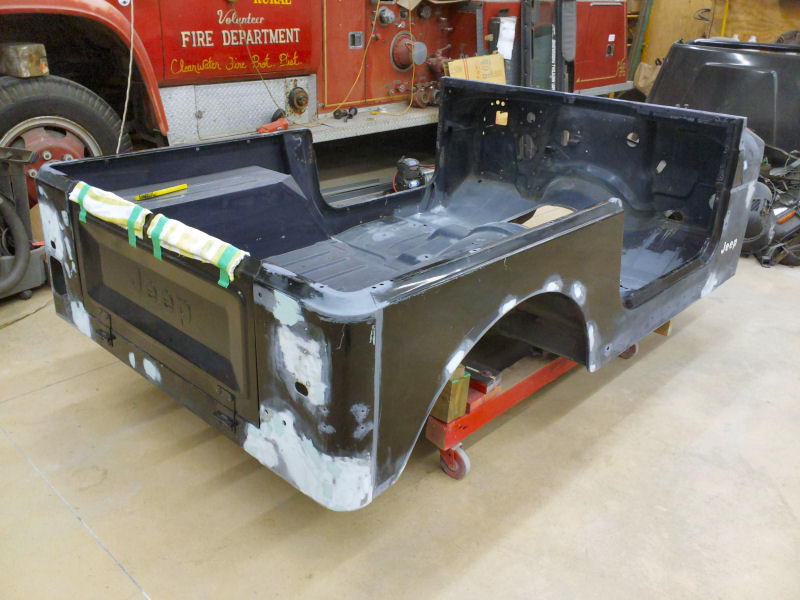
The grill shell is final sanded and ready for paint. I dropped the Tub off at the Body Shop to get the bottom re-undercoated. I've got the Hood, Grill Shell, Windshield Frame and Tailgate all loaded up and ready for the trip to the paint booth. Then hopefully time in the paint booth and start painting. I've started collecting all the miscellaneous small parts that I'll need to clean and paint for re-assembly. 2012-12-28 | |
|
|
My buddy at the Body Shop got the undercoating complete on the underside of the tub. The advantage of him doing it is not only the material he uses, but he also has the special coating to get inside all the channels. Next comes paint. 2012-12-31 | |